Minutes before a recent video call where I was slated to give a demo, I initiated a reboot on my System76 Oryx Pro laptop, but it did not come back up after seemingly powering off. I attempted to manually power on and found it unresponsive. The machine was connected to power, so I saw the familiar power and battery LEDs illuminated on the front of the machine.
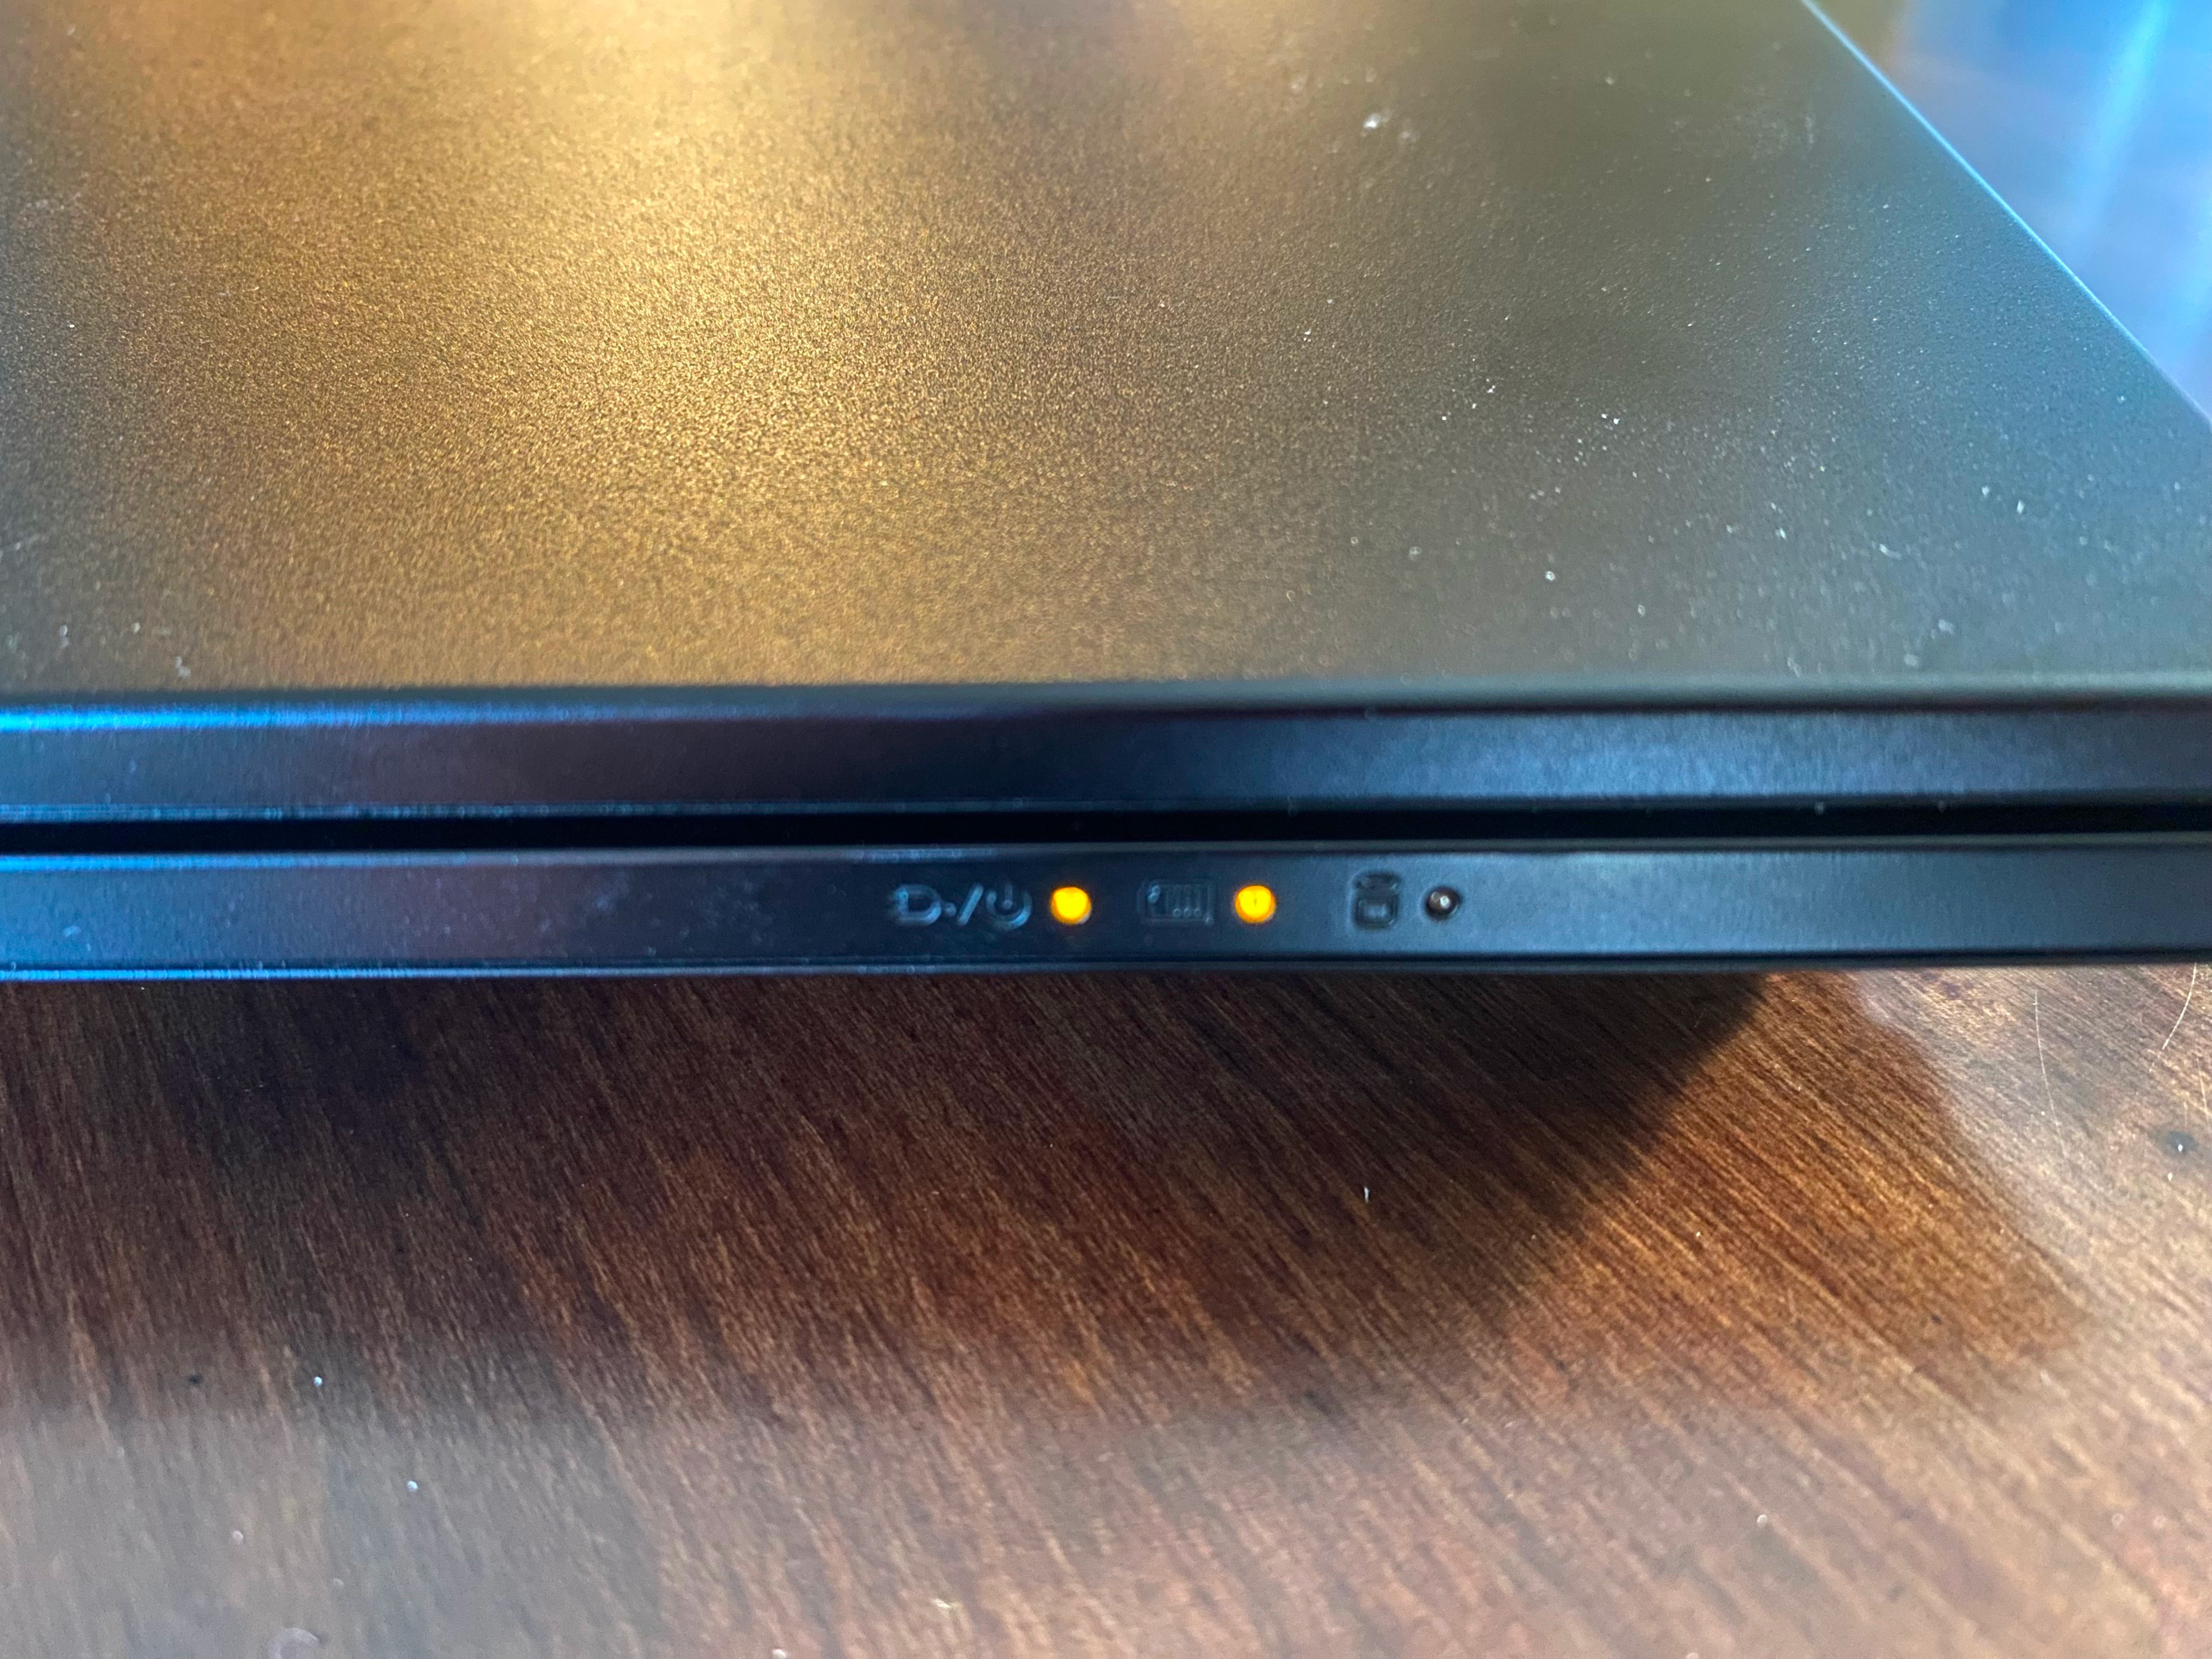
Given that the machine appeared to not even be attempting to boot, I suspected that the issue was likely related to power or the battery. I unplugged the power cable and immediately observed some strange behavior: both the power and charging LEDs remained illuminated. The battery indicator made sense, but the power indicator certainly did not. I had never seen the power LED illuminated with the power cable disconnected. Clearly the machine was either in some sort of deadlock, unable to respond to input, or was confused about its current power state, resulting in an inability to transition to boot.
I’m a big fan of System76, primarily because of their transparency,
documentation, and use of open source software. For example, the Oryx Pro
documentation (my
model is an oryp10) provides links to their open source embedded controller
(EC) firmware, as well as instructions on how
to open up the machine and replace
components. There is
a table detailing the intended
meaning
of the three LED indicators, but I had also previously checked the firmware
version of my machine using the System76 ectool
utility.
$ sudo system76_ectool info
board: system76/oryp10
version: 2023-06-08_36c78ea
Using this information, I could look up the power management logic for the embedded controller by finding the relevant commit in the System76 Open Firmware repository, then checking the commit of the embedded controller submodule.
src/board/system76/common/power.c
    if (power_state == POWER_STATE_S0) {
#if CONFIG_BUS_ESPI
        // HOST_C10 virtual wire is high when CPU is in C10 sleep state
        if (vw_get(&VW_HOST_C10) == VWS_HIGH) {
            // Modern suspend, flashing green light
            if ((time - last_time) >= 1000) {
                gpio_set(&LED_PWR, !gpio_get(&LED_PWR));
                last_time = time;
            }
            gpio_set(&LED_ACIN, false);
        } else
#endif
        {
            // CPU on, green light
            gpio_set(&LED_PWR, true);
            gpio_set(&LED_ACIN, false);
        }
    } else if (power_state == POWER_STATE_S3) {
        // Suspended, flashing green light
        if ((time - last_time) >= 1000) {
            gpio_set(&LED_PWR, !gpio_get(&LED_PWR));
            last_time = time;
        }
        gpio_set(&LED_ACIN, false);
    } else if (!ac_new) {
        // AC plugged in, orange light
        gpio_set(&LED_PWR, false);
        gpio_set(&LED_ACIN, true);
    } else {
        // CPU off and AC adapter unplugged, flashing orange light
        gpio_set(&LED_PWR, false);
        if ((time - last_time) >= 1000) {
            gpio_set(&LED_ACIN, !gpio_get(&LED_ACIN));
            last_time = time;
        }

#if HAVE_XLP_OUT
        // Power off VDD3 if system should be off
        gpio_set(&XLP_OUT, 0);
#endif // HAVE_XLP_OUT
    }

//TODO: do not require both LEDs
#if HAVE_LED_BAT_CHG && HAVE_LED_BAT_FULL
    if (!(battery_info.status & BATTERY_INITIALIZED)) {
        // No battery connected
        gpio_set(&LED_BAT_CHG, false);
        gpio_set(&LED_BAT_FULL, false);
    } else if (ac_new) {
        // Discharging (no AC adapter)
        gpio_set(&LED_BAT_CHG, false);
        gpio_set(&LED_BAT_FULL, false);
    } else if (battery_info.current == 0) {
        // Fully charged
        // TODO: turn off charger
        gpio_set(&LED_BAT_CHG, false);
        gpio_set(&LED_BAT_FULL, true);
    } else {
        // Charging
        gpio_set(&LED_BAT_CHG, true);
        gpio_set(&LED_BAT_FULL, false);
    }
#endif // HAVE_LED_BAT_CHG && HAVE_LED_BAT_FULL
At this point, I had joined the video call on a separate machine, but it was not suitable for the demo I was planning to perform. Ideally I would have been able to preserve the system state of the Oryx Pro to debug the issue, but given the time crunch my primary focus was getting it up and running again. I jumped to the repair documentation and grabbed my iFixit repair kit. After finding the proper bit for the body screws on the Oryx Pro, I began to quickly remove them from the bottom of the machine, continuing to participate in the video call as I went.

The Oryx Pro enclosure is a bit decieving, as the rectangular groove on the bottom is not actually a seam and the separation point for the top and bottom is higher up on the side of the body. After removing all the screws, I was able to carefully pry the bottom plate off of the machine.
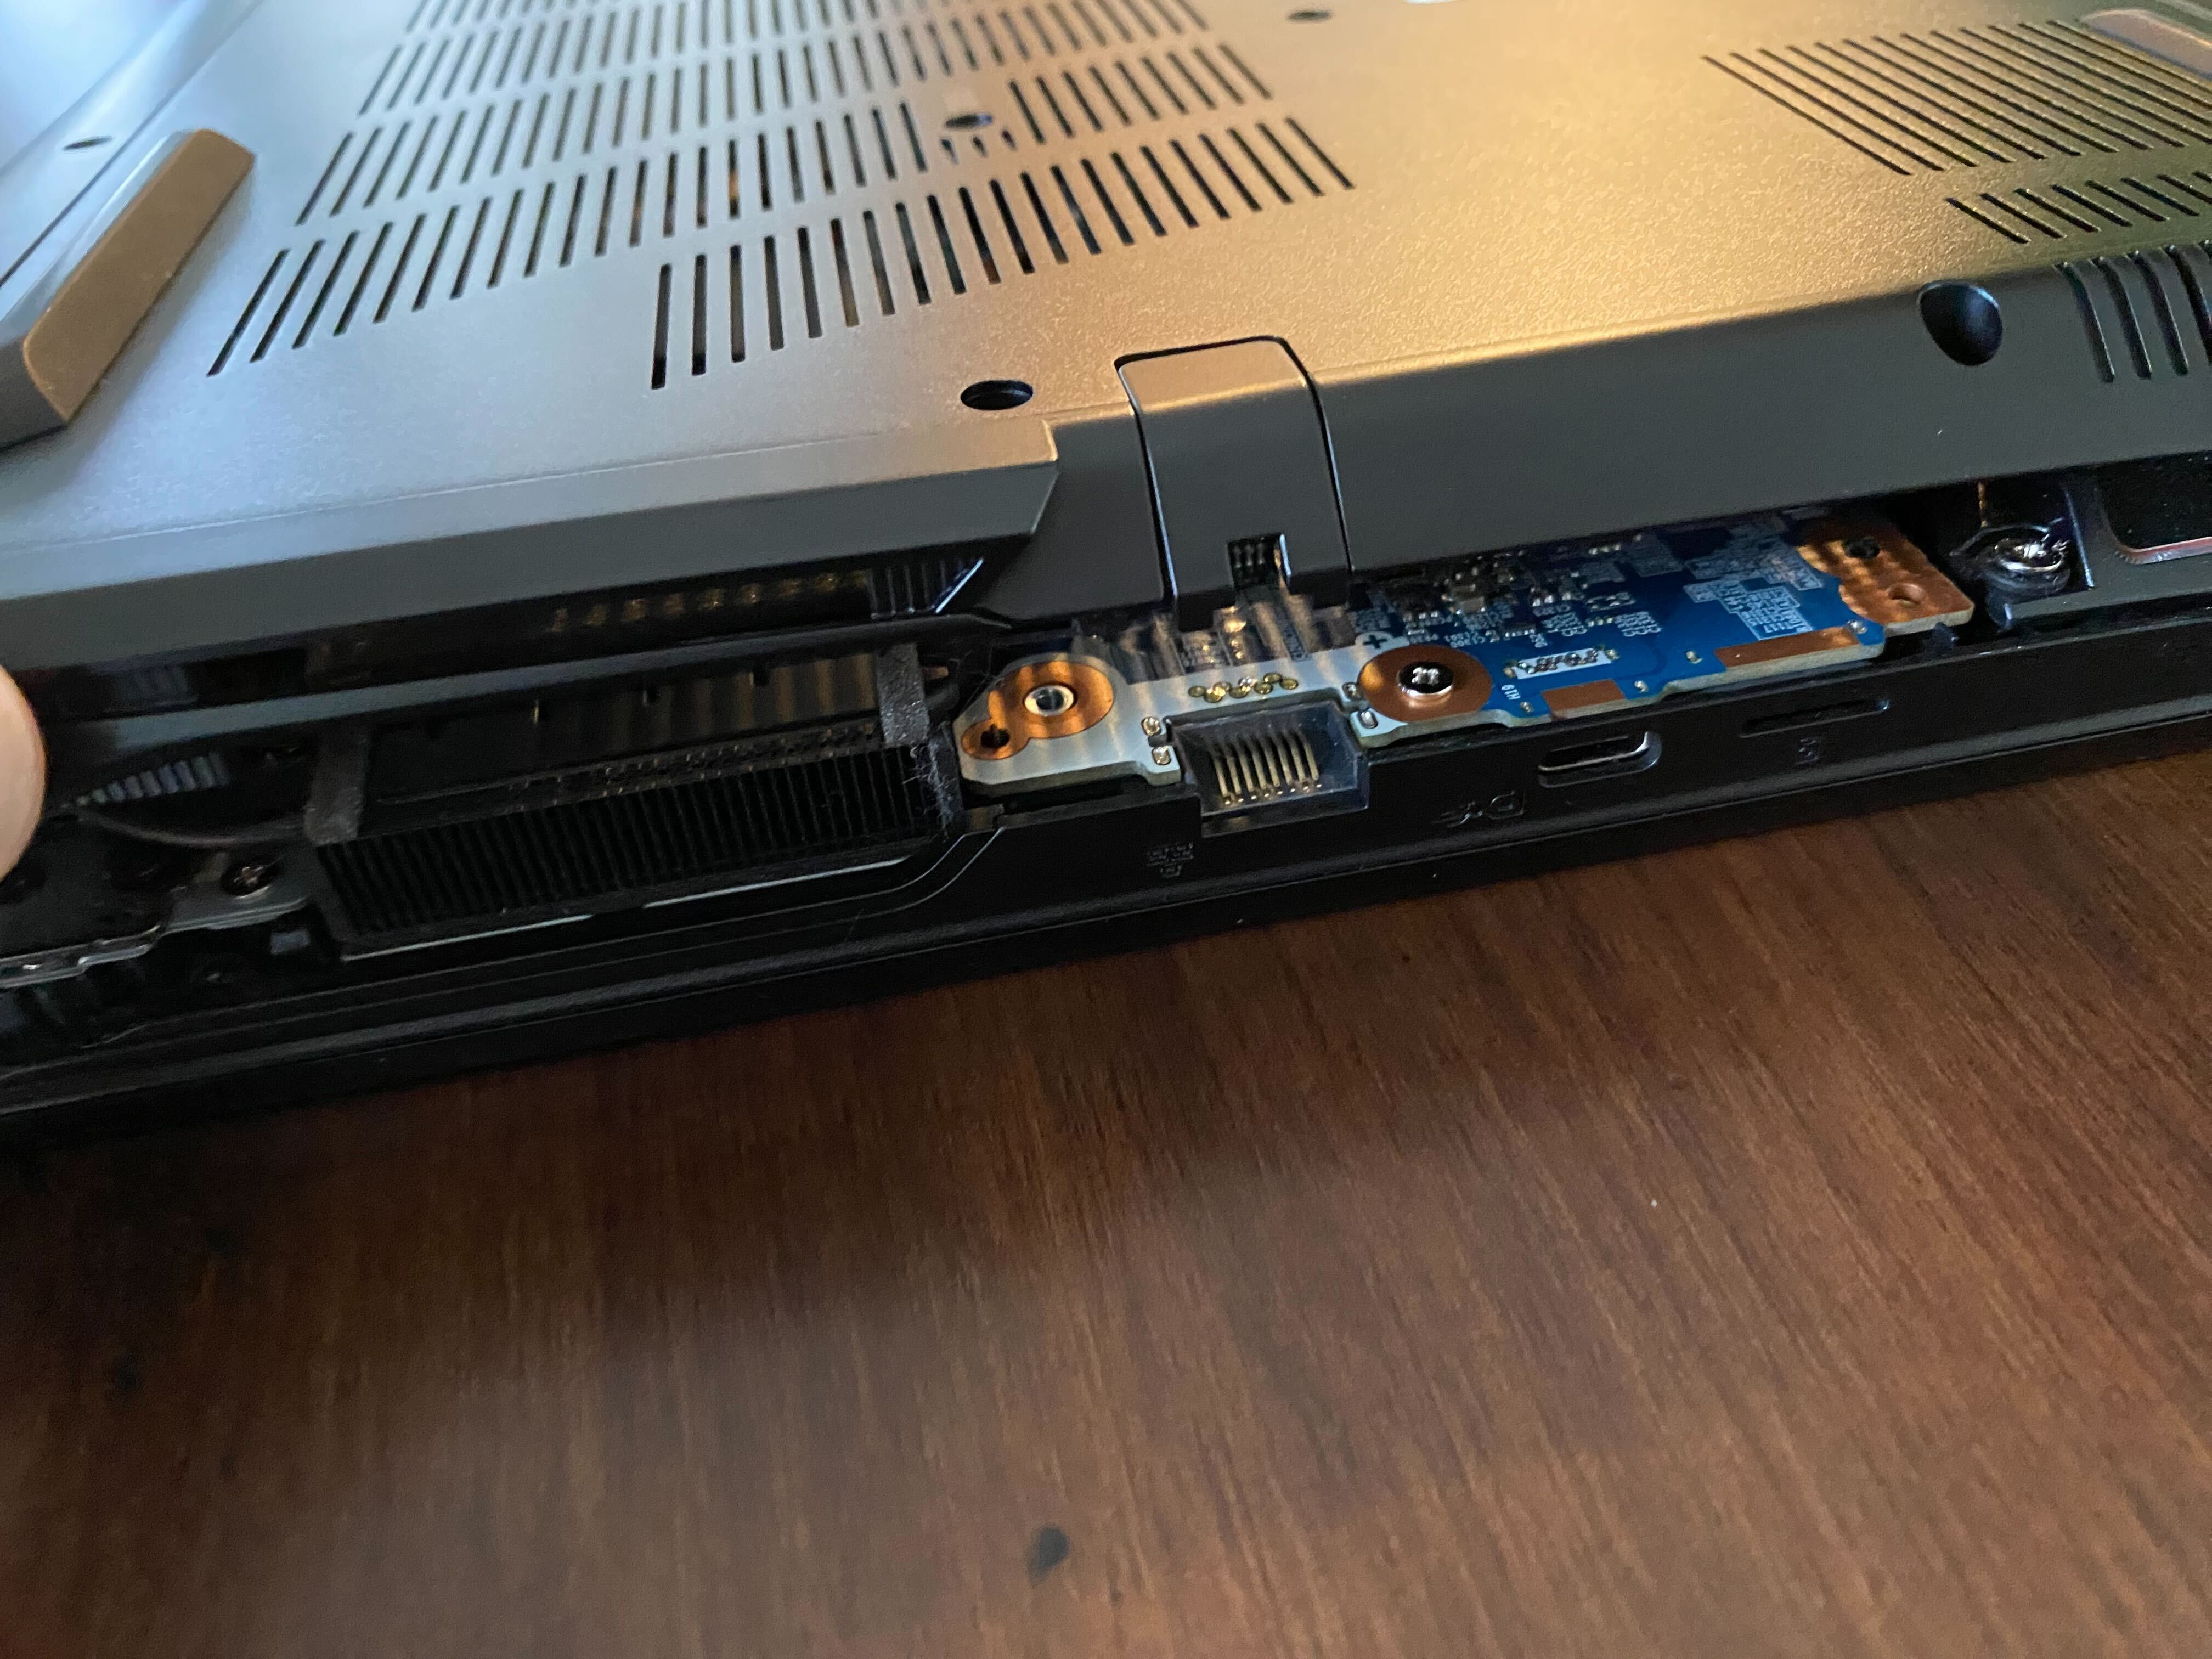
With the bottom plate removed, I was greeted by the motherboard’s components, the largest of which was the battery.
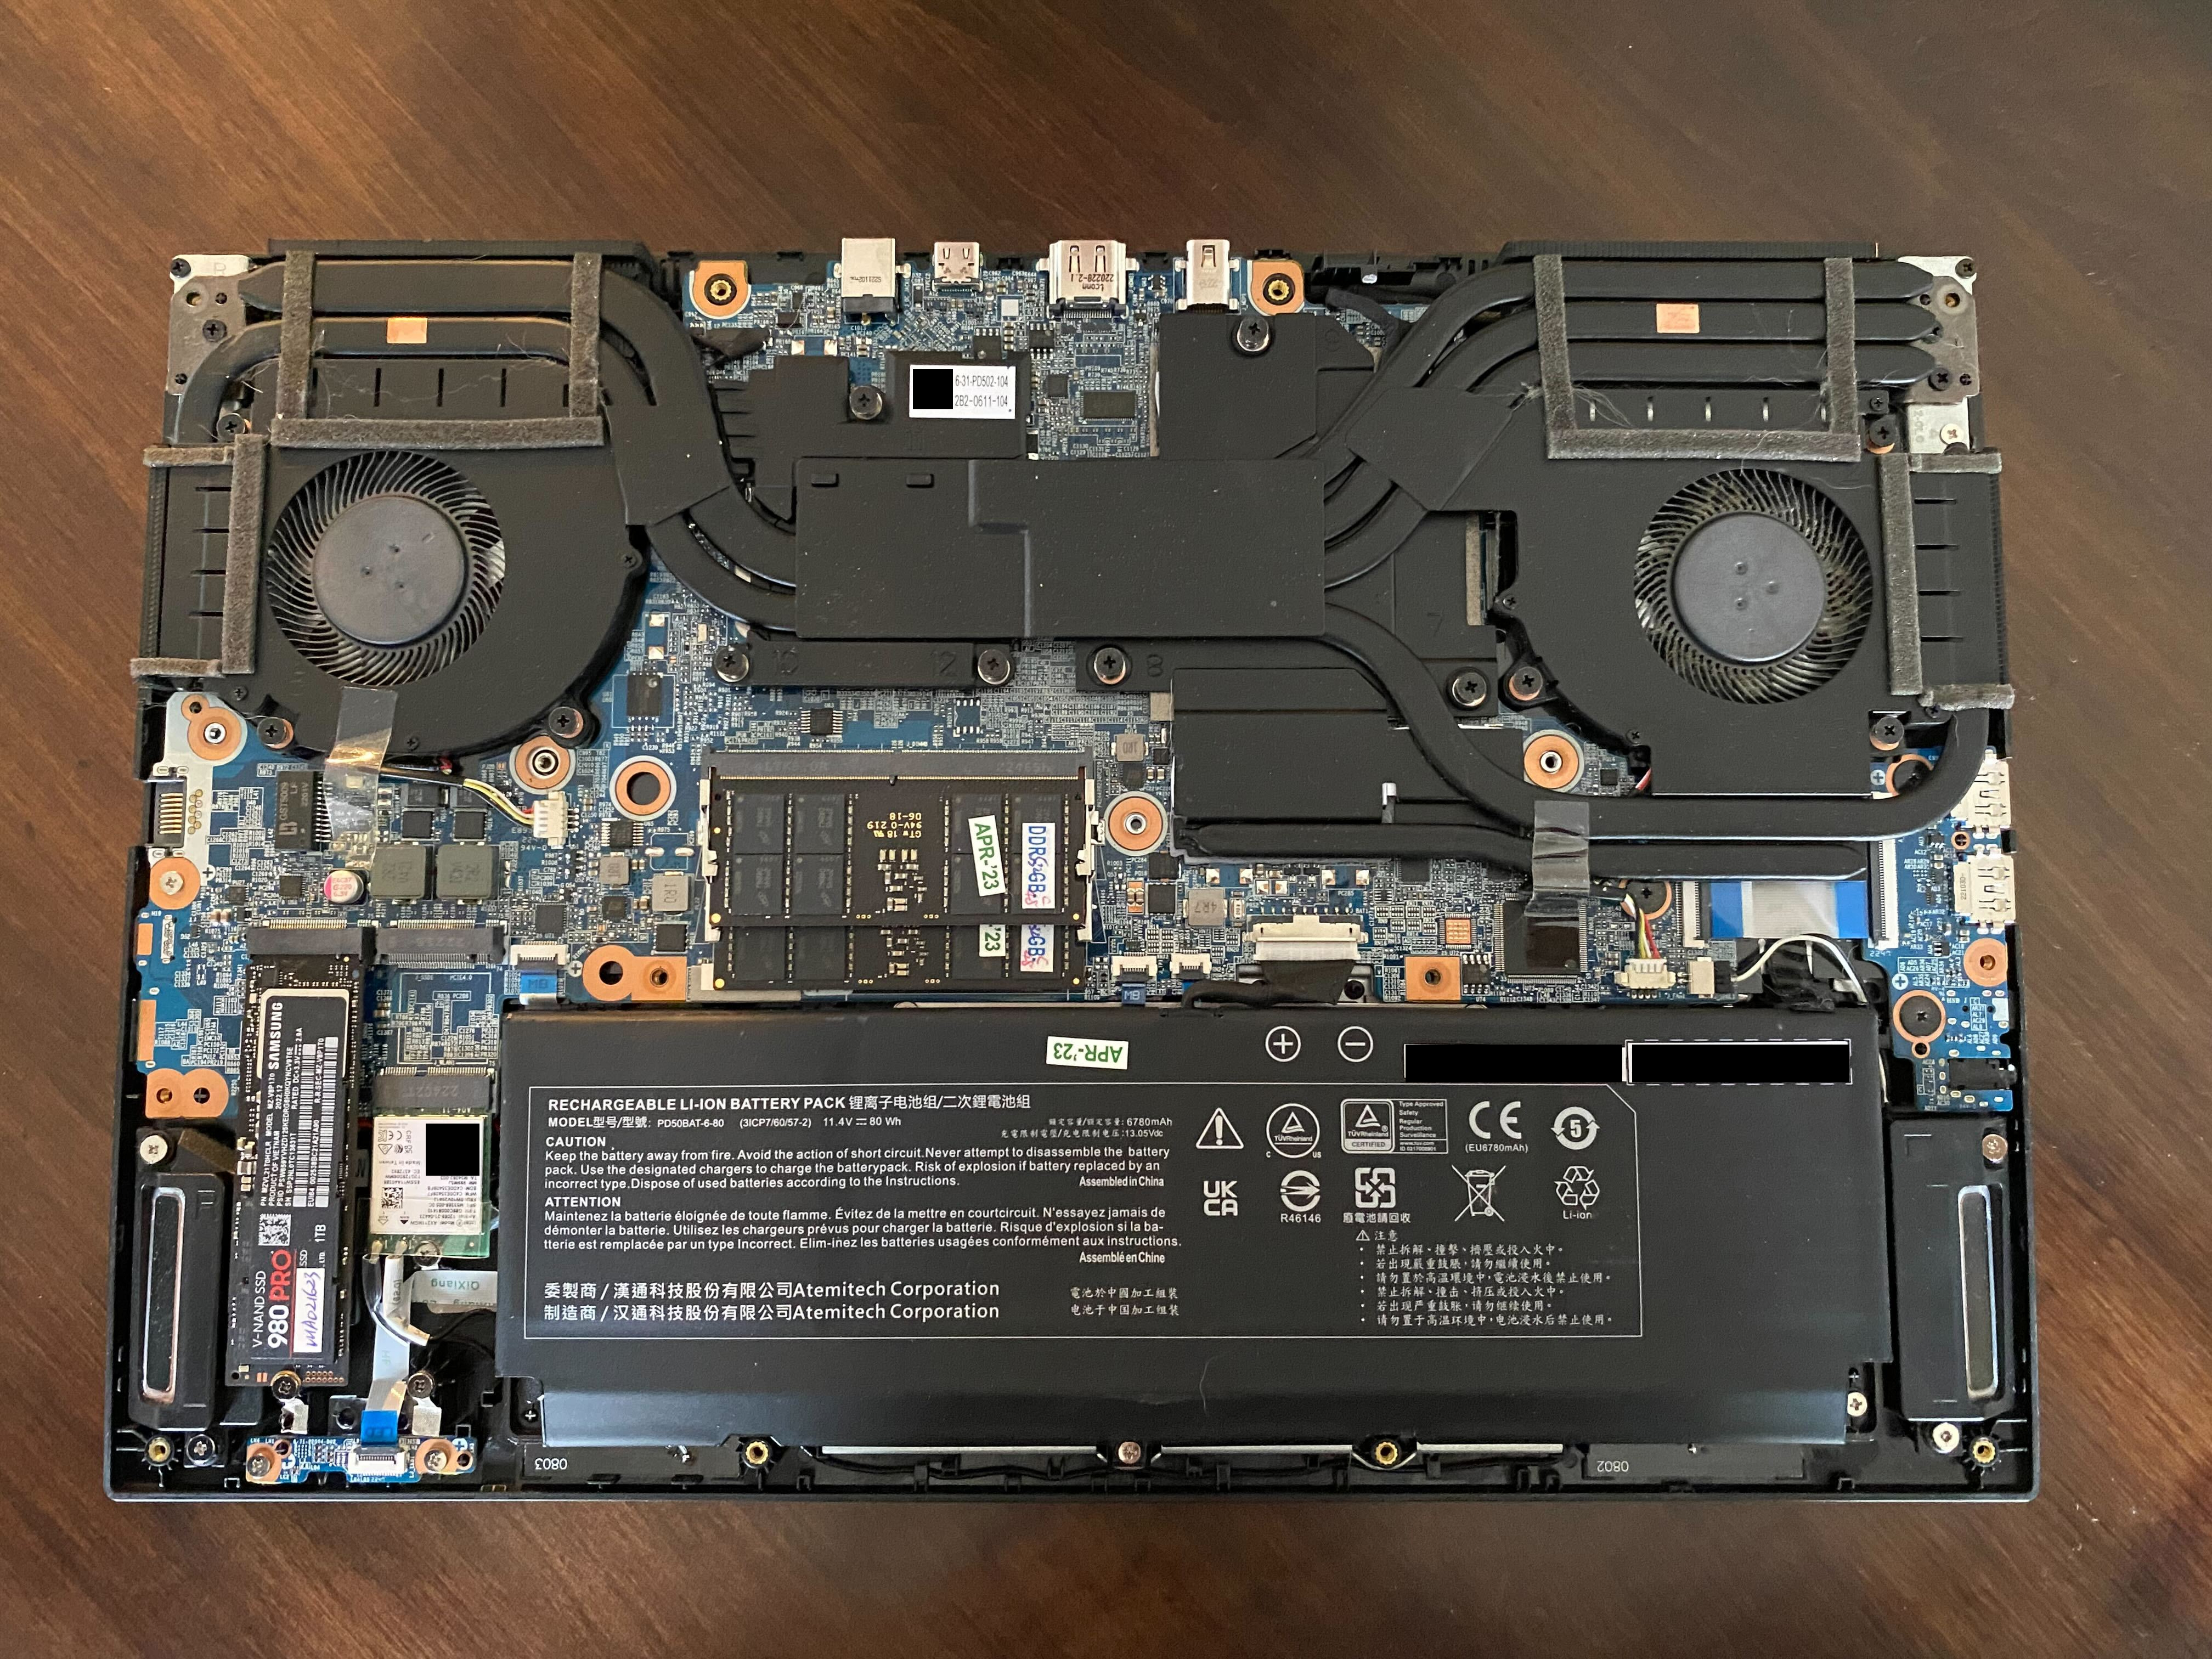
I figured that if I could cut all power to the machine, it would ensure that the power state would be re-evaluated when power was re-applied. I used the tweezers from the iFixit kit to disconnect the battery’s cable from the connector on the motherboard.
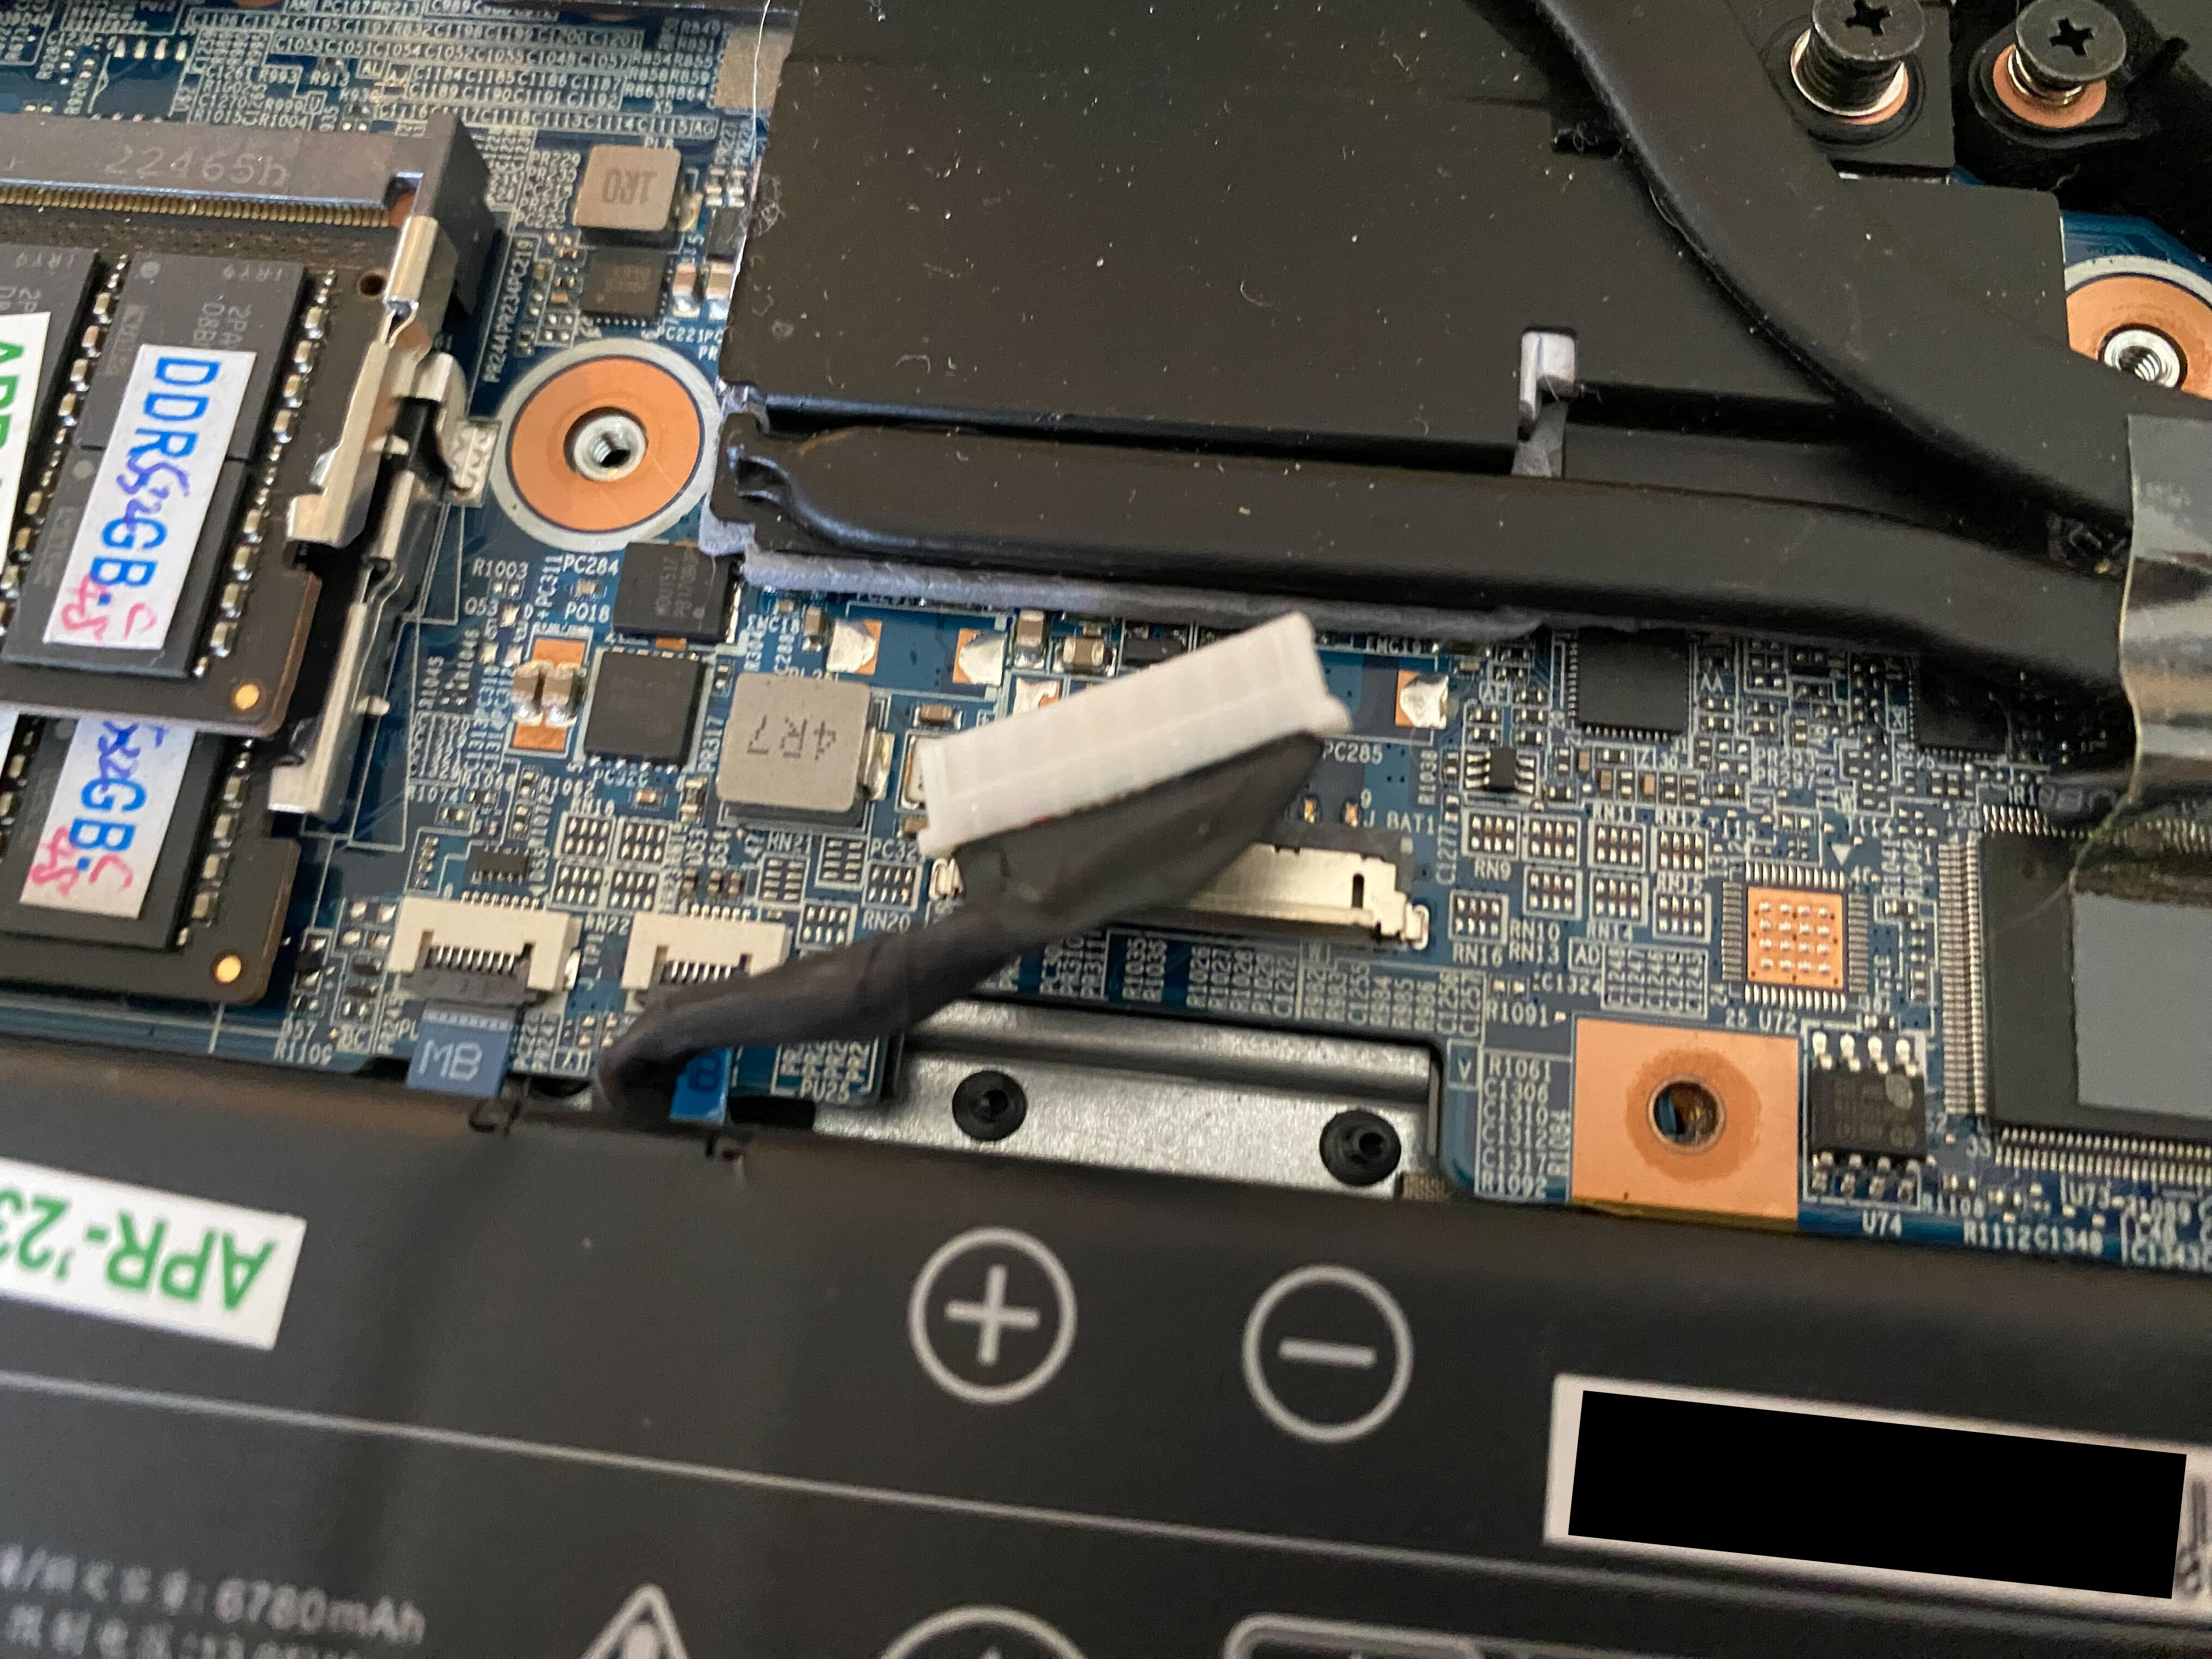
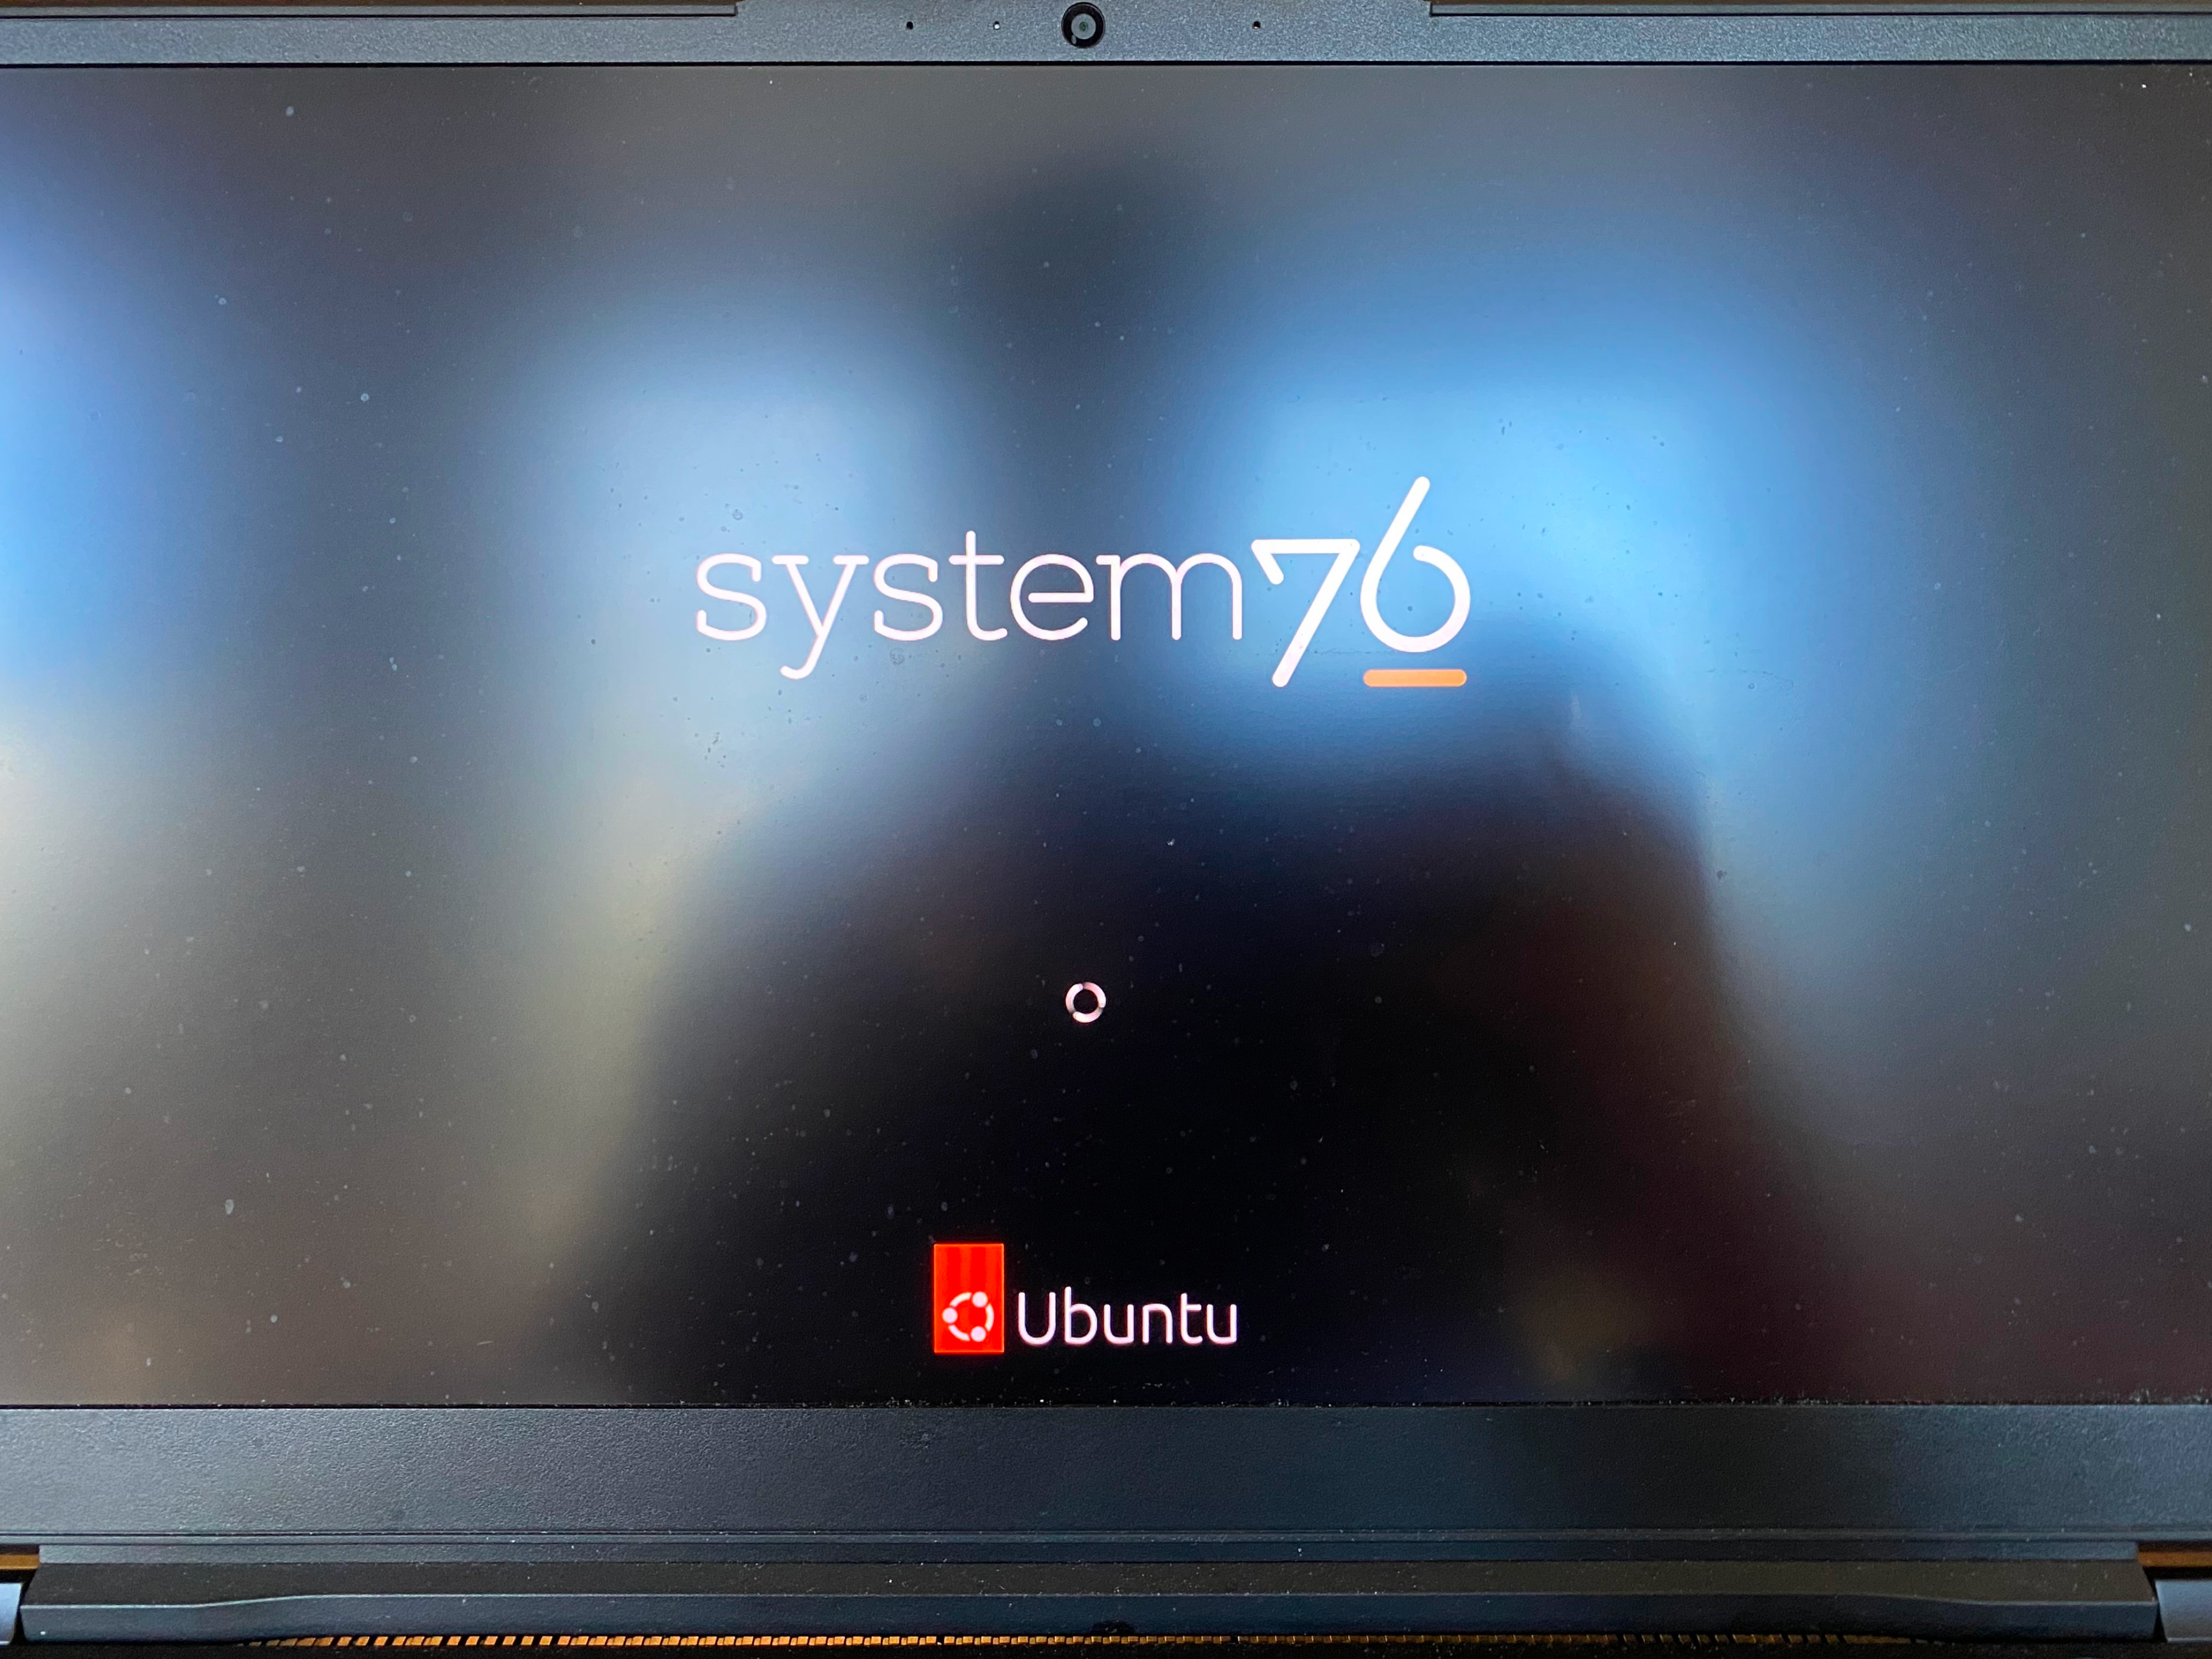
The indicator lights expectedly immediately turned off… success? I wasn’t sure whether just temporarily disconnecting from power would cause the machine to resume operating correctly, and I would be able to be connected to power for the remainder of the call, so I opted to remove the battery variable from the equation. I left it disconnected, quickly snapped back on the bottom plate, then plugged in the power cable. The single power indicator light came on, which was a good sign. I held my breath and pressed the power button… the System76 boot screen appeared!
I quickly logged in and joined the video call from the Oryx Pro. Moments later, the presenter handed over to me to begin the demo, and it went off without a hitch.
I’m looking forward to reproducing the issue and debugging the EC firmware, but I always enjoy the process of finding a pragmatic solution under pressure. Some may argue that more mainstream laptops wouldn’t have an issue like this. I would argue that I wouldn’t have been able to fix them so quickly if they did.