I recently acquired an ESP32-C3-DevKitC-02 module, and, as I tend to do, jumped right into reading about how the system boots and how the (pretty good!) tooling Espressif offers works. We have typically used QEMU in the RISC-V Bytes series, but getting our hands on physical hardware starts to make things feel a bit more real. In this first post on the ESP32, we’ll do some basic setup and look at a simple custom bootloader.
Sections Link to heading
- Booting Up
- Installing Tools
- The Boot Process
- The Serial Protocol
- Overriding the Second Stage Bootloader
- Looking Behind the Scenes
- Concluding Thoughts
Booting Up Link to heading
The system boots when power is supplied. Because of this, to monitor the logs,
you’ll likely need to issue a reset after opening the serial port with a tool
such as minicom. With the device connected to your machine, you should be able
to find the serial port under /dev/ttyUSB*. On my machine it was
/dev/ttyUSB0. The baud rate is 115200, which is the default for minicom.
$ minicom -D /dev/ttyUSB0
If we then press the RST button, we should see output. Before overwriting, a
Rainmaker
demo was pre-programmed on my module, and it printed some ASCII art over the
serial port.
Installing Tools Link to heading
Espressif provides tooling that makes building projects for any ESP32 module
much simpler. Though certainly not strictly required, Espressif highly
recommends the use of the esp-idf (ESP IOT Development
Framework). In the root of the
repository, you’ll find instructions to get started with one of the install
scripts. As usual, I am on a Linux machine, so I used the install.sh
script.
$ ./install.sh
Detecting the Python interpreter
Checking "python3" ...
Python 3.8.10
"python3" has been detected
Checking Python compatibility
Installing ESP-IDF tools
Current system platform: linux-amd64
Selected targets are: esp32c2, esp32c6, esp32s2, esp32c3, esp32, esp32s3, esp32h4, esp32h2
Installing tools: xtensa-esp-elf-gdb, riscv32-esp-elf-gdb, xtensa-esp32-elf, xtensa-esp32s2-elf, xtensa-esp32s3-elf, riscv32-esp-elf, esp32ulp-elf, openocd-esp32, esp-rom-elfs
Skipping xtensa-esp-elf-gdb@12.1_20221002 (already installed)
Skipping riscv32-esp-elf-gdb@12.1_20221002 (already installed)
Skipping xtensa-esp32-elf@esp-12.2.0_20230208 (already installed)
Skipping xtensa-esp32s2-elf@esp-12.2.0_20230208 (already installed)
Skipping xtensa-esp32s3-elf@esp-12.2.0_20230208 (already installed)
Skipping riscv32-esp-elf@esp-12.2.0_20230208 (already installed)
Skipping esp32ulp-elf@2.35_20220830 (already installed)
Skipping openocd-esp32@v0.11.0-esp32-20221026 (already installed)
Skipping esp-rom-elfs@20230113 (already installed)
Installing Python environment and packages
...
Installing collected packages: esp-idf-monitor
  Attempting uninstall: esp-idf-monitor
    Found existing installation: esp-idf-monitor 1.0.1
    Uninstalling esp-idf-monitor-1.0.1:
      Successfully uninstalled esp-idf-monitor-1.0.1
Successfully installed esp-idf-monitor-1.0.0
All done! You can now run:

  . ./export.sh
By default, this will install the toolchains for all targets (or skip if they
are already present as shown above). It will also install supporting tools, such
as idf.py and esptool. You can take a look at everything installed in
~/.espressif.
$ ls ~/.espressif/tools/
esp32ulp-elf/        esp-rom-elfs/        openocd-esp32/       riscv32-esp-elf/     riscv32-esp-elf-gdb/ xtensa-esp32-elf/    xtensa-esp32s2-elf/  xtensa-esp32s3-elf/  xtensa-esp-elf-gdb/

$ ls ~/.espressif/python_env/idf5.1_py3.8_env/bin/
activate               allmodconfig           doesitcache            esptool.py             menuconfig             pip                    pyserial-miniterm      savedefconfig
activate.csh           allnoconfig            esp-coredump           futurize               normalizer             pip3                   pyserial-ports         setconfig
activate.fish          allyesconfig           espefuse.py            genconfig              oldconfig              pip3.8                 python                 tqdm
Activate.ps1           compote                esp_rfc2217_server.py  guiconfig              olddefconfig           __pycache__/           python3                west
alldefconfig           defconfig              espsecure.py           listnewconfig          pasteurize             pykwalify              readelf.py
To add the necessary tools to your $PATH, the corresponding export script can
be sourced.
$ . ./export.sh
Detecting the Python interpreter
Checking "python3" ...
Python 3.8.10
"python3" has been detected
Checking Python compatibility
Checking other ESP-IDF version.
Using a supported version of tool cmake found in PATH: 3.16.3.
However the recommended version is 3.24.0.
Adding ESP-IDF tools to PATH...
Using a supported version of tool cmake found in PATH: 3.16.3.
However the recommended version is 3.24.0.
Checking if Python packages are up to date...
Constraint file: /home/dan/.espressif/espidf.constraints.v5.1.txt
Requirement files:
 - /home/dan/code/github.com/espressif/esp-idf/tools/requirements/requirements.core.txt
Python being checked: /home/dan/.espressif/python_env/idf5.1_py3.8_env/bin/python
Python requirements are satisfied.
Added the following directories to PATH:
  /home/dan/code/github.com/espressif/esp-idf/components/esptool_py/esptool
  /home/dan/code/github.com/espressif/esp-idf/components/espcoredump
  /home/dan/code/github.com/espressif/esp-idf/components/partition_table
  /home/dan/code/github.com/espressif/esp-idf/components/app_update
Done! You can now compile ESP-IDF projects.
Go to the project directory and run:

  idf.py build
As indicated in the output, we are now ready to start building!
The Boot Process Link to heading
The boot process is described in detail in the ESP32-C3 API
Guide.
The main takeaway is that booting is a two stage process, where the first stage
bootloader, which is stored in ROM and cannot be modified, loads the second
stage one. The second stage bootloader lives in flash memory at offset 0x0,
but is loaded into RAM by the first stage bootloader.
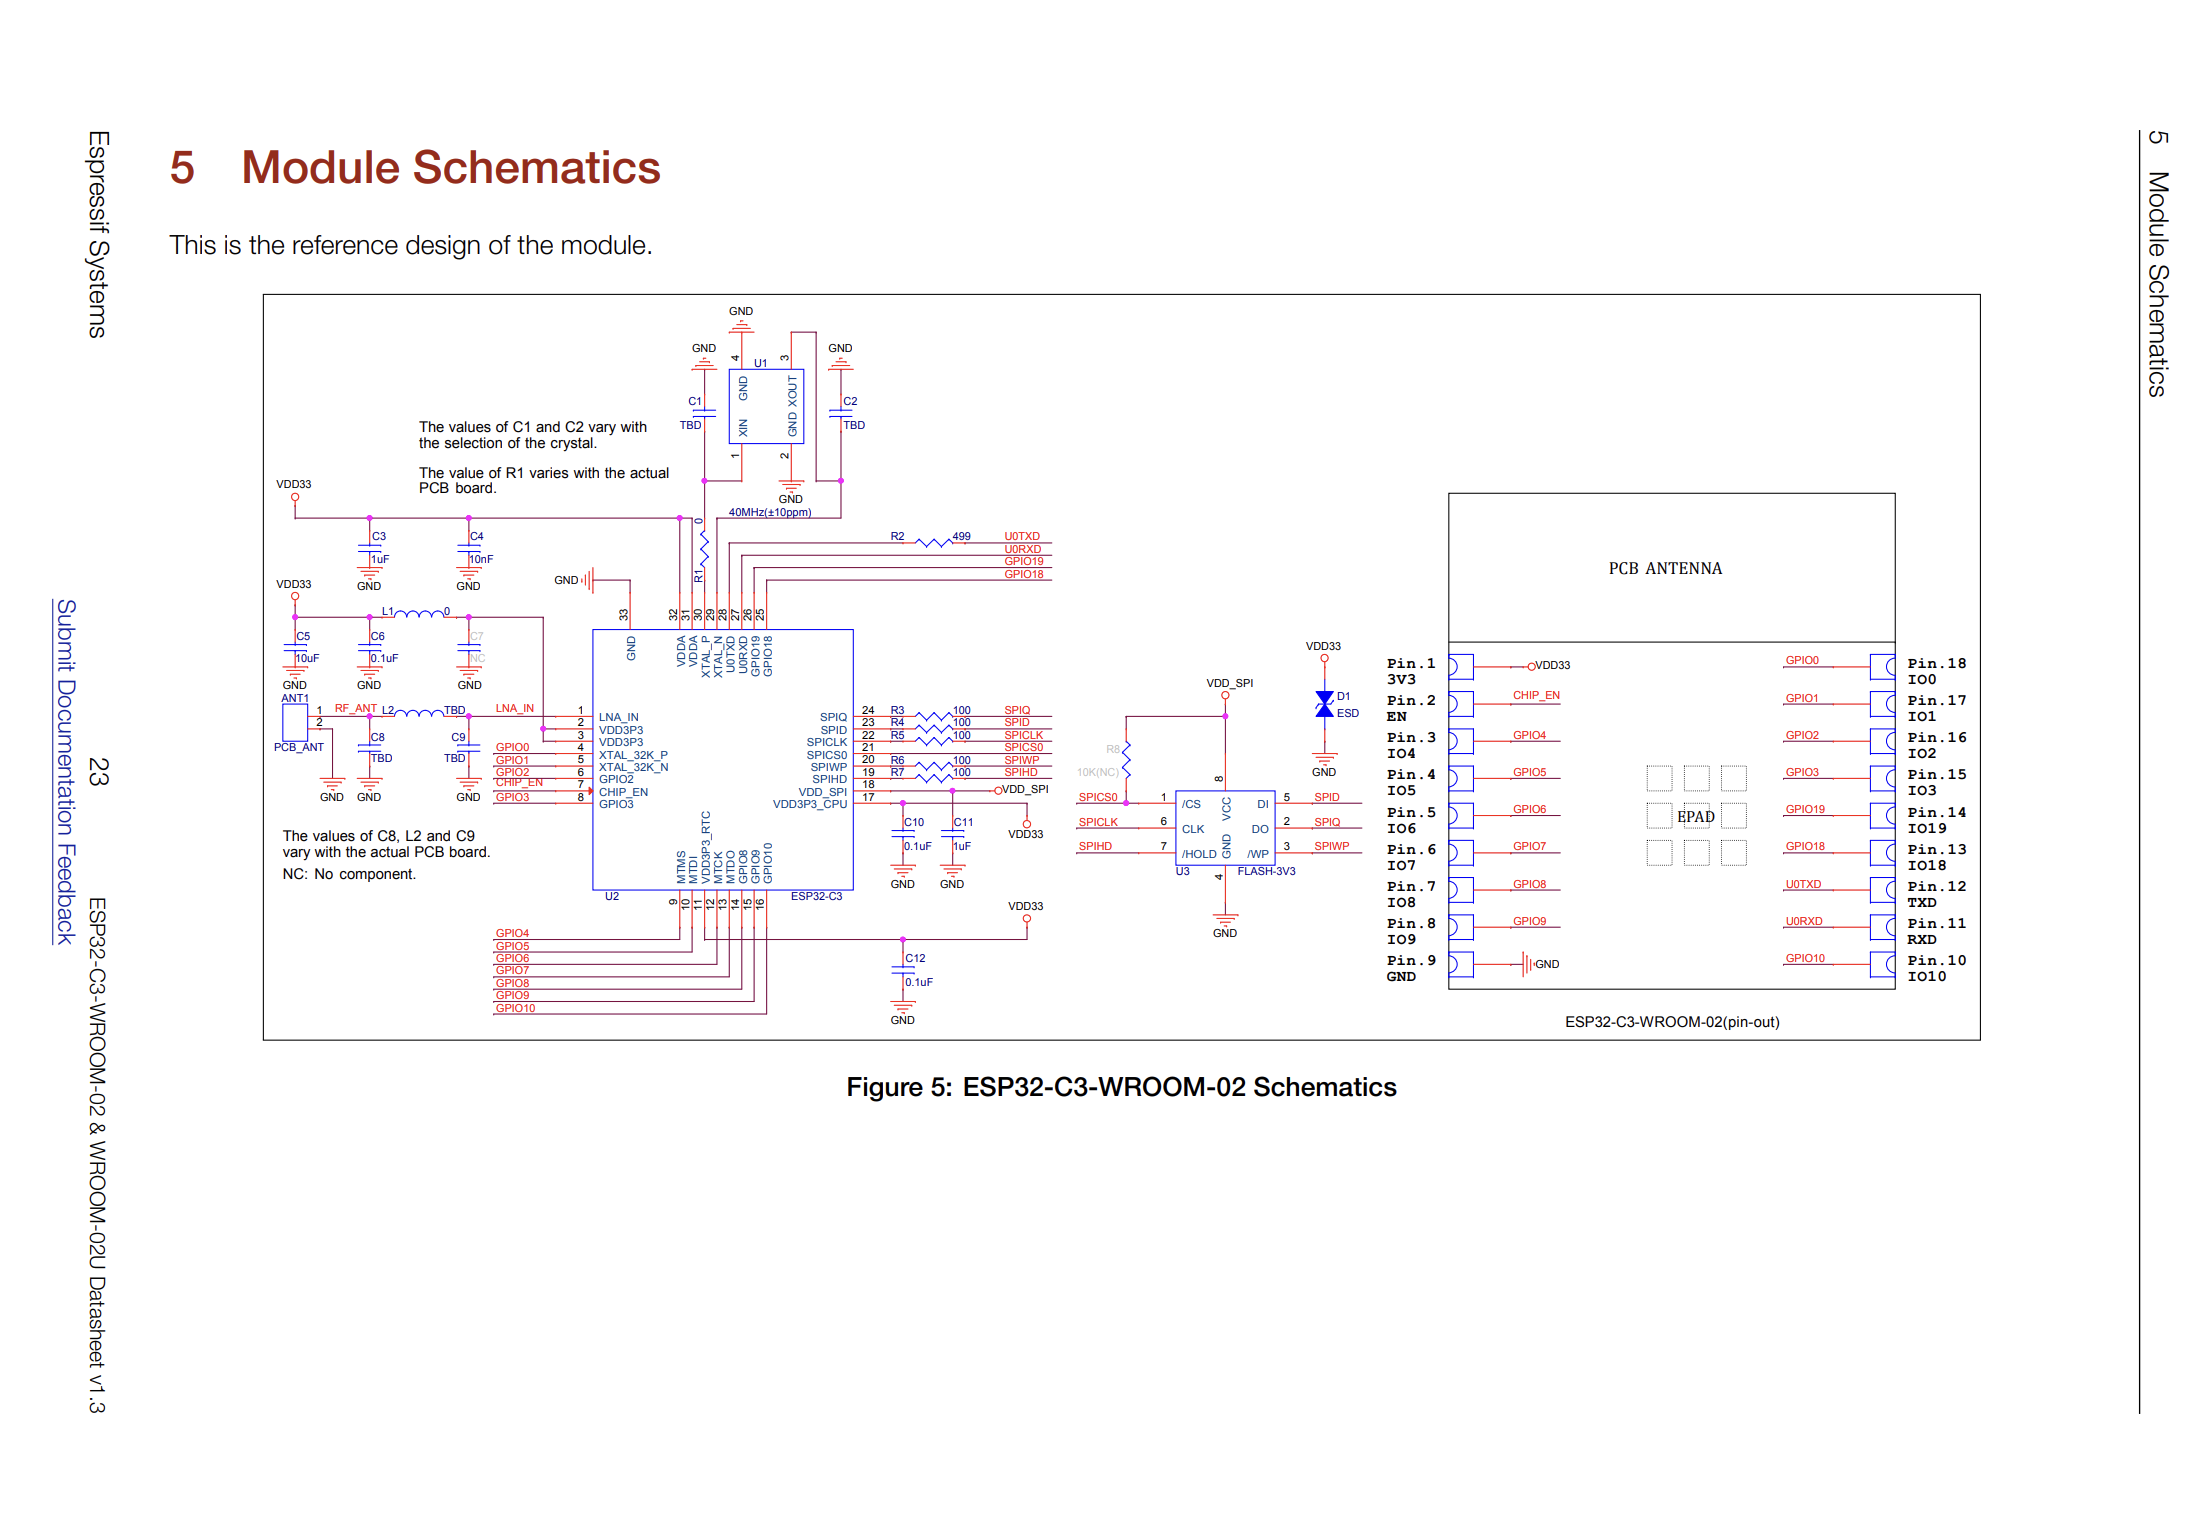
Before diving deeper, it is useful to understand the various components of the ESP32-C3-DevKitC-02. The ESP32-C3 is the system-on-chip (SoC), but lives inside of the ESP32-C3-WROOM-02 module. The module surrounds the SoC with peripherals, such as SPI flash and a PCB Antenna, enabling the combined unit to utilize WiFi, Bluetooth LE, and more. The module itself is surrounded by other peripherals on the development kit PCB, such as the micro-USB port and USB-to-UART bridge, making it much easier to interact with from our host machine.
In order to overwrite the second stage bootloader in flash, we’ll need to communicate with the ESP32-C3, which will then talk over the SPI bus to the flash that lives beside it in the WROOM module.
The Serial Protocol Link to heading
One of the tools installed during setup was esptool.py. Though most of the
documentation uses idf.py, many of the commands it offers are just wrapping
esptool.py and passing necessary flags. The ESP32-C3 can be configured to
boot in “serial
mode”,
which implements a serial
protocol
with support for a variety of commands that allow for operations such as reading
and writing to flash. Interestingly, by default esptool.py will load a stub
bootloader
that implements the same protocol, but has some optimizations and additional
features. You can choose to skip loading the stub bootloader by passing the
--no-stub argument to any command.
The serial protocol is based on the Serial Line Internet Protocol. The documentation provides the full specification for packet format, but the general structure for commands and responses are reproduced below.
Command Packets
| Byte | Name | Comment |
|---|---|---|
| 0 | Direction | Always 0x00 for requests |
| 1 | Command | Command identifier (see Commands). |
| 2-3 | Size | Length of Data field, in bytes. |
| 4-7 | Checksum | Simple checksum of part of the data field (only used for some commands, see Checksum). |
| 8..n | Data | Variable length data payload (0-65535 bytes, as indicated by Size parameter). Usage depends on specific command. |
Response Packets
| Byte | Name | Comment |
|---|---|---|
| 0 | Direction | Always 0x01 for responses |
| 1 | Command | Same value as Command identifier in the request packet that triggered the response |
| 2-3 | Size | Size of data field. At least the length of the Status Bytes (2 or 4 bytes, see below). |
| 4-7 | Value | Response value used by READ_REG command (see below). Zero otherwise. |
| 8..n | Data | Variable length data payload. Length indicated by “Size” field. |
Command sequences used for writing data follow a similar pattern of a single begin command, followed by some number of data commands, then a single end command. This pattern is used to both load the stub bootloader and, subsequently, load the second stage bootloader. The former is written to RAM, while the latter is written to flash. The commands for writing to RAM are:
MEM_BEGIN(0x05)MEM_DATA(0x07)MEM_END(0x06)
The MEM_END command supports supplying an execute flag and an address in RAM
(each 32-bit words) that the chip will begin executing instructions at if
execute flag is set. The commands for writing to flash are:
FLASH_BEGIN(0x02)FLASH_DATA(0x03)FLASH_END(0x04)
The FLASH_END command can supply a single 32-bit word and if the value is 0
the chip will reboot.
Overriding the Second Stage Bootloader Link to heading
Fortunately, the esp-idf repo has an
example
of how the second stage bootloader can be overridden. It is quite similar to the
default second stage
bootloader,
but it allows for
customizing
an additional message that is printed on startup.
Prior to running the commands in the README.md, we need to specify which ESP32
SoC we are targeting.
$ idf.py set-target esp32c3
Adding "set-target"'s dependency "fullclean" to list of commands with default set of options.
Executing action: fullclean
Executing action: set-target
Set Target to: esp32c3, new sdkconfig will be created.
...
-- Configuring done
-- Generating done
-- Build files have been written to: /home/dan/code/github.com/espressif/esp-idf/examples/custom_bootloader/bootloader_override/build
This will ensure that we have the necessary toolchain components and setup the
proper configuration (sdkconfig). It will also setup the build directory
machinery, which we can then exercise.
$ idf.py build
Executing action: all (aliases: build)
Running cmake in directory /home/dan/code/github.com/espressif/esp-idf/examples/custom_bootloader/bootloader_override/build
Executing "cmake -G Ninja -DPYTHON_DEPS_CHECKED=1 -DPYTHON=/home/dan/.espressif/python_env/idf5.1_py3.8_env/bin/python -DESP_PLATFORM=1 -DCCACHE_ENABLE=0 /home/dan/code/github.com/espressif/esp-idf/examples/custom_bootloader/bootloader_override"...
-- IDF_TARGET is not set, guessed 'esp32c3' from sdkconfig '/home/dan/code/github.com/espressif/esp-idf/examples/custom_bootloader/bootloader_override/sdkconfig'
...
[848/849] Generating binary image from built executable
esptool.py v4.5.1
Creating esp32c3 image...
Merged 1 ELF section
Successfully created esp32c3 image.
Generated /home/dan/code/github.com/espressif/esp-idf/examples/custom_bootloader/bootloader_override/build/main.bin
[849/849] cd /home/dan/code/github.com/espressif/esp-idf/examples/custom_bootloader/bootloader_override/build/esp-idf/esptool_py && /home/dan/.espressif/python_env/idf5.1_py3.8_env/bin/python /home/dan/code/github.com/espressif/esp-idf/components/partition_table/check_sizes.py --offset 0x8000 partition --type app /home/dan/code/github.com/espressif/esp-idf/examples/custom_bootloader/bootloader_override/build/partition_table/partition-table.bin /home/dan/code/github.com/espressif/esp-idf/examples/custom_bootloader/bootloader_override/build/main.bin
main.bin binary size 0x28e00 bytes. Smallest app partition is 0x100000 bytes. 0xd7200 bytes (84%) free.

Project build complete. To flash, run this command:
/home/dan/.espressif/python_env/idf5.1_py3.8_env/bin/python ../../../components/esptool_py/esptool/esptool.py -p (PORT) -b 460800 --before default_reset --after hard_reset --chip esp32c3  write_flash --flash_mode dio --flash_size 2MB --flash_freq 80m 0x0 build/bootloader/bootloader.bin 0x8000 build/partition_table/partition-table.bin 0x10000 build/main.bin
or run 'idf.py -p (PORT) flash'
We can see that it automatically defaulted to the esp32c3 target, built
artifacts, and provided the command to be used to flash the device. The two
command options demonstrate how idf.py wraps esptool, which will write three
different binaries to various locations in flash with the write_flash command.
build/bootloader/bootloader.binwill be written to0x0build/partition_table/partition-table.binwill be written to0x8000build/main.binwill be written to0x10000
We’ll dig a little deeper into what the binaries are, as well as why they are being written to those offsets in flash in the next section, but first let’s see it in action!
NOTE: we can leave off
-p /dev/ttyUSB0as it is the default.
$ idf.py flash
Executing action: flash
Serial port /dev/ttyUSB0
Connecting....
Detecting chip type... ESP32-C3
Running ninja in directory /home/dan/code/github.com/espressif/esp-idf/examples/custom_bootloader/bootloader_override/build
Executing "ninja flash"...
[1/5] cd /home/dan/code/github.com/espressif/esp-idf/examples/custom_bootloader/bootloader_override/build/esp-idf/esptool_py && /home/dan/.espressif/python_env/idf5.1_py3.8_env/bin/python /home/dan/code/github.com/espressif/esp-idf/components/partition_table/check_sizes.py --offset 0x8000 partition --type app /home/dan/code/github.com/espressif/esp-idf/examples/custom_bootloader/bootloader_override/build/partition_table/partition-table.bin /home/dan/code/github.com/espressif/esp-idf/examples/custom_bootloader/bootloader_override/build/main.bin
main.bin binary size 0x28e00 bytes. Smallest app partition is 0x100000 bytes. 0xd7200 bytes (84%) free.
[2/5] Performing build step for 'bootloader'
[1/1] cd /home/dan/code/github.com/espressif/esp-idf/examples/custom_bootloader/bootloader_override/build/bootloader/esp-idf/esptool_py && /home/dan/.espressif/python_env/idf5.1_py3.8_env/bin/python /home/dan/code/github.com/espressif/esp-idf/components/partition_table/check_sizes.py --offset 0x8000 bootloader 0x0 /home/dan/code/github.com/espressif/esp-idf/examples/custom_bootloader/bootloader_override/build/bootloader/bootloader.bin
Bootloader binary size 0x5080 bytes. 0x2f80 bytes (37%) free.
[2/3] cd /home/dan/code/github.com/espressif/esp-idf/components/esptool_py && /usr/bin/cmake -D IDF_PATH=/home/dan/code/github.com/espressif/esp-idf -D "SERIAL_TOOL=/home/dan/.espressif/python_env/idf5.1_py3.8_env/bin/python;;/home/dan/code/github.com/espressif/esp-idf/components/esptool_py/esptool/esptool.py;--chip;esp32c3" -D "SERIAL_TOOL_ARGS=--before=default_reset;--after=hard_reset;write_flash;@flash_args" -D WORKING_DIRECTORY=/home/dan/code/github.com/espressif/esp-idf/examples/custom_bootloader/bootloader_override/build -P /home/dan/code/github.com/espressif/esp-idf/components/esptool_py/run_serial_tool.cmake
esptool esp32c3 -p /dev/ttyUSB0 -b 460800 --before=default_reset --after=hard_reset write_flash --flash_mode dio --flash_freq 80m --flash_size 2MB 0x0 bootloader/bootloader.bin 0x10000 main.bin 0x8000 partition_table/partition-table.bin
esptool.py v4.5.1
Serial port /dev/ttyUSB0
Connecting....
Chip is ESP32-C3 (revision v0.3)
Features: WiFi, BLE
Crystal is 40MHz
MAC: 58:cf:79:16:7d:a0
Uploading stub...
Running stub...
Stub running...
Changing baud rate to 460800
Changed.
Configuring flash size...
Flash will be erased from 0x00000000 to 0x00005fff...
Flash will be erased from 0x00010000 to 0x00038fff...
Flash will be erased from 0x00008000 to 0x00008fff...
Compressed 20608 bytes to 12655...
Writing at 0x00000000... (100 %)
Wrote 20608 bytes (12655 compressed) at 0x00000000 in 0.7 seconds (effective 244.4 kbit/s)...
Hash of data verified.
Compressed 167424 bytes to 88511...
Writing at 0x00010000... (16 %)
Writing at 0x0001a51f... (33 %)
Writing at 0x0002104c... (50 %)
Writing at 0x00028442... (66 %)
Writing at 0x0002ec04... (83 %)
Writing at 0x00035e5c... (100 %)
Wrote 167424 bytes (88511 compressed) at 0x00010000 in 2.8 seconds (effective 477.3 kbit/s)...
Hash of data verified.
Compressed 3072 bytes to 103...
Writing at 0x00008000... (100 %)
Wrote 3072 bytes (103 compressed) at 0x00008000 in 0.1 seconds (effective 295.2 kbit/s)...
Hash of data verified.

Leaving...
Hard resetting via RTS pin...
Done
Much of the logic in this step can be found in the
source
for the write_flash command, but at a high level the steps are as follows:
- Load stub bootloader.
...
Uploading stub...
Running stub...
Stub running...
...
- Erase flash sections.
...
Configuring flash size...
Flash will be erased from 0x00000000 to 0x00005fff...
Flash will be erased from 0x00010000 to 0x00038fff...
Flash will be erased from 0x00008000 to 0x00008fff...
...
- Write second stage bootloader to flash.
...
Compressed 20608 bytes to 12655...
Writing at 0x00000000... (100 %)
Wrote 20608 bytes (12655 compressed) at 0x00000000 in 0.7 seconds (effective 244.4 kbit/s)...
Hash of data verified.
...
- Write application to flash.
...
Compressed 167424 bytes to 88511...
Writing at 0x00010000... (16 %)
Writing at 0x0001a51f... (33 %)
Writing at 0x0002104c... (50 %)
Writing at 0x00028442... (66 %)
Writing at 0x0002ec04... (83 %)
Writing at 0x00035e5c... (100 %)
Wrote 167424 bytes (88511 compressed) at 0x00010000 in 2.8 seconds (effective 477.3 kbit/s)...
Hash of data verified.
...
- Write partition table to flash.
...
Compressed 3072 bytes to 103...
Writing at 0x00008000... (100 %)
Wrote 3072 bytes (103 compressed) at 0x00008000 in 0.1 seconds (effective 295.2 kbit/s)...
Hash of data verified.
...
- Reset chip.
...
Leaving...
Hard resetting via RTS pin...
Done
In order to see what happens on boot now, we can once again connect via
minicom and press the RST button.
$ minicom -D /dev/ttyUSB0

ESP-ROM:esp32c3-api1-20210207
Build:Feb  7 2021
rst:0x1 (POWERON),boot:0xc (SPI_FAST_FLASH_BOOT)
SPIWP:0xee
mode:DIO, clock div:1
load:0x3fcd5820,len:0x1754
load:0x403cc710,len:0x970
load:0x403ce710,len:0x2f68
entry 0x403cc710
I (30) boot: ESP-IDF 4f0769d2ed 2nd stage bootloader
I (30) boot: compile time Apr  8 2023 18:51:23
I (30) boot: chip revision: v0.3
I (34) boot.esp32c3: SPI Speed      : 80MHz
I (38) boot.esp32c3: SPI Mode       : DIO
I (43) boot.esp32c3: SPI Flash Size : 2MB
I (48) boot: Enabling RNG early entropy source...
I (53) boot: Partition Table:
I (57) boot: ## Label            Usage          Type ST Offset   Length
I (64) boot:  0 nvs              WiFi data        01 02 00009000 00006000
I (71) boot:  1 phy_init         RF data          01 01 0000f000 00001000
I (79) boot:  2 factory          factory app      00 00 00010000 00100000
I (86) boot: End of partition table
[boot] Custom bootloader message defined in the KConfig file.
I (96) esp_image: segment 0: paddr=00010020 vaddr=3c020020 size=08480h ( 33920) map
I (110) esp_image: segment 1: paddr=000184a8 vaddr=3fc8aa00 size=01110h (  4368) load
I (114) esp_image: segment 2: paddr=000195c0 vaddr=40380000 size=06a58h ( 27224) load
I (126) esp_image: segment 3: paddr=00020020 vaddr=42000020 size=15018h ( 86040) map
I (143) esp_image: segment 4: paddr=00035040 vaddr=40386a58 size=03d9ch ( 15772) load
I (149) boot: Loaded app from partition at offset 0x10000
I (149) boot: Disabling RNG early entropy source...
I (163) cpu_start: Pro cpu up.
I (172) cpu_start: Pro cpu start user code
I (172) cpu_start: cpu freq: 160000000 Hz
I (172) cpu_start: Application information:
I (175) cpu_start: Project name:     main
I (180) cpu_start: App version:      4f0769d2ed
I (185) cpu_start: Compile time:     Apr  8 2023 18:51:16
I (191) cpu_start: ELF file SHA256:  3916cd87115c6efe...
I (197) cpu_start: ESP-IDF:          4f0769d2ed
I (203) cpu_start: Min chip rev:     v0.3
I (207) cpu_start: Max chip rev:     v0.99
I (212) cpu_start: Chip rev:         v0.3
I (217) heap_init: Initializing. RAM available for dynamic allocation:
I (224) heap_init: At 3FC8C940 len 0004FDD0 (319 KiB): DRAM
I (230) heap_init: At 3FCDC710 len 00002950 (10 KiB): STACK/DRAM
I (237) heap_init: At 50000020 len 00001FE0 (7 KiB): RTCRAM
I (244) spi_flash: detected chip: generic
I (248) spi_flash: flash io: dio
W (252) spi_flash: Detected size(4096k) larger than the size in the binary image header(2048k). Using the size in the binary image header.
I (265) sleep: Configure to isolate all GPIO pins in sleep state
I (272) sleep: Enable automatic switching of GPIO sleep configuration
I (279) app_start: Starting scheduler on CPU0
I (284) main_task: Started on CPU0
I (284) main_task: Calling app_main()
Application started!
I (294) main_task: Returned from app_main()
The second stage bootloader is loaded and executed successfully, as evidenced by the custom message.
[boot] Custom bootloader message defined in the KConfig file.
We can also see the message from the simple application that the bootloader jumps to.
Application started!
Looking Behind the Scenes Link to heading
Now that we’ve run the example custom bootloader, let’s explore the binary to
get a sense of what is happening behind the scenes. The entrypoint to the second
stage bootloader is
call_start_cpu0(void).
examples/custom_bootloader/bootloader_override/bootloader_components/main/bootloader_start.c
/*
 * We arrive here after the ROM bootloader finished loading this second stage bootloader from flash.
 * The hardware is mostly uninitialized, flash cache is down and the app CPU is in reset.
 * We do have a stack, so we can do the initialization in C.
 */
void __attribute__((noreturn)) call_start_cpu0(void)
{
    // 1. Hardware initialization
    if (bootloader_init() != ESP_OK) {
        bootloader_reset();
    }

#ifdef CONFIG_BOOTLOADER_SKIP_VALIDATE_IN_DEEP_SLEEP
    // If this boot is a wake up from the deep sleep then go to the short way,
    // try to load the application which worked before deep sleep.
    // It skips a lot of checks due to it was done before (while first boot).
    bootloader_utility_load_boot_image_from_deep_sleep();
    // If it is not successful try to load an application as usual.
#endif

    // 2. Select the number of boot partition
    bootloader_state_t bs = {0};
    int boot_index = select_partition_number(&bs);
    if (boot_index == INVALID_INDEX) {
        bootloader_reset();
    }

    // 2.1 Print a custom message!
    esp_rom_printf("[%s] %s\n", TAG, CONFIG_EXAMPLE_BOOTLOADER_WELCOME_MESSAGE);

    // 3. Load the app image for booting
    bootloader_utility_load_boot_image(&bs, boot_index);
}
The provided comments are helpful to understand what is happening, and we’ll
explore them in a moment, but how does the first stage bootloader know to jump
here? Our custom bootloader is reusing the same linker
script
as the default second stage bootloader, which defines the entrypoint at the
location of the call_start_cpu0 function.
components/bootloader/subproject/main/ld/esp32c3/bootloader.ld
/* Default entry point: */
ENTRY(call_start_cpu0);
It also defines a few memory
regions
for instruction memory (IRAM) and data memory (DRAM).
components/bootloader/subproject/main/ld/esp32c3/bootloader.ld
MEMORY
{
  iram_seg (RWX) :                  org = bootloader_iram_seg_start, len = bootloader_iram_seg_len
  iram_loader_seg (RWX) :           org = bootloader_iram_loader_seg_start, len = bootloader_iram_loader_seg_len
  dram_seg (RW) :                   org = bootloader_dram_seg_start, len = bootloader_dram_seg_len
}
The entrypoint is loaded at the beginning of th IRAM segment.
components/bootloader/subproject/main/ld/esp32c3/bootloader.ld
  .iram.text :
  {
    . = ALIGN (16);
    *(.entry.text)
    *(.init.literal)
    *(.init)
  } > iram_seg
We can see this layout in effect by examining the
ELF file we
built for the bootloader image. If you successfully added all installed tools to
your path, you should be able to use riscv32-esp-elf-objdump.
$ riscv32-esp-elf-objdump -h build/bootloader/bootloader.elf

build/bootloader/bootloader.elf:     file format elf32-littleriscv

Sections:
Idx Name          Size      VMA       LMA       File off  Algn
  0 .iram_loader.text 00002f66  403ce710  403ce710  00003710  2**1
                  CONTENTS, ALLOC, LOAD, READONLY, CODE
  1 .iram.text    00000000  403cc710  403cc710  00006676  2**0
                  CONTENTS
  2 .dram0.bss    00000110  3fcd5710  3fcd5710  00000710  2**2
                  ALLOC
  3 .dram0.data   00000004  3fcd5820  3fcd5820  00000820  2**2
                  CONTENTS, ALLOC, LOAD, DATA
  4 .dram0.rodata 00001750  3fcd5824  3fcd5824  00000824  2**2
                  CONTENTS, ALLOC, LOAD, READONLY, DATA
  5 .iram.text    0000096e  403cc710  403cc710  00002710  2**1
                  CONTENTS, ALLOC, LOAD, READONLY, CODE
  6 .debug_info   000229fa  00000000  00000000  00006676  2**0
                  CONTENTS, READONLY, DEBUGGING, OCTETS
  7 .debug_abbrev 000048b6  00000000  00000000  00029070  2**0
                  CONTENTS, READONLY, DEBUGGING, OCTETS
  8 .debug_loc    000075d6  00000000  00000000  0002d926  2**0
                  CONTENTS, READONLY, DEBUGGING, OCTETS
  9 .debug_aranges 00000808  00000000  00000000  00034efc  2**0
                  CONTENTS, READONLY, DEBUGGING, OCTETS
 10 .debug_ranges 000015b8  00000000  00000000  00035704  2**0
                  CONTENTS, READONLY, DEBUGGING, OCTETS
 11 .debug_line   00010e82  00000000  00000000  00036cbc  2**0
                  CONTENTS, READONLY, DEBUGGING, OCTETS
 12 .debug_str    0000a1e0  00000000  00000000  00047b3e  2**0
                  CONTENTS, READONLY, DEBUGGING, OCTETS
 13 .comment      0000002f  00000000  00000000  00051d1e  2**0
                  CONTENTS, READONLY
 14 .riscv.attributes 0000003f  00000000  00000000  00051d4d  2**0
                  CONTENTS, READONLY
 15 .debug_frame  000014bc  00000000  00000000  00051d8c  2**2
                  CONTENTS, READONLY, DEBUGGING, OCTETS
NOTE: the
-hflag indicates that we want just the section headers.
We see two .iram.text sections, which look identical except for the Size and
Algn (alignment). Because all of the .iram.text symbols are 16-bit aligned
(ALIGN (16)), the 1-byte aligned section (2**0 or 2^0 = 1) is empty, and
all of the data is in the 2-byte aligned (2**0 or 2^1 = 2) section. Both
sections have the same virtual memory address (VMA), which makes sense given
that the size of the first section is 0. We can jump to the .iram.text
section to see if our call_start_cpu0 function is indeed present.
$ riscv32-esp-elf-objdump -D -j .iram.text build/bootloader/bootloader.elf | head -46

build/bootloader/bootloader.elf:     file format elf32-littleriscv


Disassembly of section .iram.text:

403cc710 <call_start_cpu0>:
403cc710:	7171                	addi	sp,sp,-176
403cc712:	d706                	sw	ra,172(sp)
403cc714:	d522                	sw	s0,168(sp)
403cc716:	d326                	sw	s1,164(sp)
403cc718:	2895                	jal	403cc78c <bootloader_init>
403cc71a:	c119                	beqz	a0,403cc720 <call_start_cpu0+0x10>
403cc71c:	55a030ef          	jal	ra,403cfc76 <bootloader_reset>
403cc720:	0a000613          	li	a2,160
403cc724:	4581                	li	a1,0
403cc726:	850a                	mv	a0,sp
403cc728:	ffc34097          	auipc	ra,0xffc34
403cc72c:	c2c080e7          	jalr	-980(ra) # 40000354 <memset>
403cc730:	850a                	mv	a0,sp
403cc732:	19a030ef          	jal	ra,403cf8cc <bootloader_utility_load_partition_table>
403cc736:	3fcd64b7          	lui	s1,0x3fcd6
403cc73a:	ed19                	bnez	a0,403cc758 <call_start_cpu0+0x48>
403cc73c:	688020ef          	jal	ra,403cedc4 <esp_log_early_timestamp>
403cc740:	85aa                	mv	a1,a0
403cc742:	3fcd6537          	lui	a0,0x3fcd6
403cc746:	86c48613          	addi	a2,s1,-1940 # 3fcd586c <_data_end+0x48>
403cc74a:	87450513          	addi	a0,a0,-1932 # 3fcd5874 <_data_end+0x50>
403cc74e:	ffc34097          	auipc	ra,0xffc34
403cc752:	8f2080e7          	jalr	-1806(ra) # 40000040 <esp_rom_printf>
403cc756:	b7d9                	j	403cc71c <call_start_cpu0+0xc>
403cc758:	850a                	mv	a0,sp
403cc75a:	3a0030ef          	jal	ra,403cfafa <bootloader_utility_get_selected_boot_partition>
403cc75e:	f9d00793          	li	a5,-99
403cc762:	842a                	mv	s0,a0
403cc764:	faf50ce3          	beq	a0,a5,403cc71c <call_start_cpu0+0xc>
403cc768:	3fcd6637          	lui	a2,0x3fcd6
403cc76c:	3fcd6537          	lui	a0,0x3fcd6
403cc770:	86c48593          	addi	a1,s1,-1940
403cc774:	8a860613          	addi	a2,a2,-1880 # 3fcd58a8 <_data_end+0x84>
403cc778:	8e050513          	addi	a0,a0,-1824 # 3fcd58e0 <_data_end+0xbc>
403cc77c:	ffc34097          	auipc	ra,0xffc34
403cc780:	8c4080e7          	jalr	-1852(ra) # 40000040 <esp_rom_printf>
403cc784:	85a2                	mv	a1,s0
403cc786:	850a                	mv	a0,sp
403cc788:	50a030ef          	jal	ra,403cfc92 <bootloader_utility_load_boot_image>
NOTE: the
-Dflag indicates that we want to disassemble all section contents. The-j .iram.textindicates that we only want the contents of the.iram.textsection.
Here we see the familiar function prologue of growing our stack (addi sp,sp,-176) and storing our callee-saved
registers
(s0, s1) on it, before progressing through the various calls to bootloader
utility functions. The bootloader_init() implementation varies per SoC, but
the high-level steps are fairly similar. The esp32c3
implementation
is shown below.
components/bootloader_support/src/esp32c3/bootloader_esp32c3.c
esp_err_t bootloader_init(void)
{
    esp_err_t ret = ESP_OK;

    bootloader_hardware_init();
    bootloader_ana_reset_config();
    bootloader_super_wdt_auto_feed();

// In RAM_APP, memory will be initialized in `call_start_cpu0`
#if !CONFIG_APP_BUILD_TYPE_RAM
    // protect memory region
    bootloader_init_mem();
    /* check that static RAM is after the stack */
    assert(&_bss_start <= &_bss_end);
    assert(&_data_start <= &_data_end);
    // clear bss section
    bootloader_clear_bss_section();
#endif // !CONFIG_APP_BUILD_TYPE_RAM

    // init eFuse virtual mode (read eFuses to RAM)
#ifdef CONFIG_EFUSE_VIRTUAL
    ESP_LOGW(TAG, "eFuse virtual mode is enabled. If Secure boot or Flash encryption is enabled then it does not provide any security. FOR TESTING ONLY!");
#ifndef CONFIG_EFUSE_VIRTUAL_KEEP_IN_FLASH
    esp_efuse_init_virtual_mode_in_ram();
#endif
#endif
    // config clock
    bootloader_clock_configure();
    // initialize console, from now on, we can use esp_log
    bootloader_console_init();
    /* print 2nd bootloader banner */
    bootloader_print_banner();

#if !CONFIG_APP_BUILD_TYPE_PURE_RAM_APP
    //init cache hal
    cache_hal_init();
    //init mmu
    mmu_hal_init();
    // update flash ID
    bootloader_flash_update_id();
    // Check and run XMC startup flow
    if ((ret = bootloader_flash_xmc_startup()) != ESP_OK) {
        ESP_LOGE(TAG, "failed when running XMC startup flow, reboot!");
        return ret;
    }
#if !CONFIG_APP_BUILD_TYPE_RAM
    // read bootloader header
    if ((ret = bootloader_read_bootloader_header()) != ESP_OK) {
        return ret;
    }
    // read chip revision and check if it's compatible to bootloader
    if ((ret = bootloader_check_bootloader_validity()) != ESP_OK) {
        return ret;
    }
#endif  //#if !CONFIG_APP_BUILD_TYPE_RAM
    // initialize spi flash
    if ((ret = bootloader_init_spi_flash()) != ESP_OK) {
        return ret;
    }
#endif // !CONFIG_APP_BUILD_TYPE_PURE_RAM_APP

    // check whether a WDT reset happend
    bootloader_check_wdt_reset();
    // config WDT
    bootloader_config_wdt();
    // enable RNG early entropy source
    bootloader_enable_random();

    return ret;
}
If all initialization is successful (i.e. bootloader_init() returns 0), we
jump over the call to bootloader_reset() with beqz and continue to loading
the application.
403cc71a:	c119                	beqz	a0,403cc720 <call_start_cpu0+0x10>
403cc71c:	55a030ef          	jal	ra,403cfc76 <bootloader_reset>
403cc720:	0a000613          	li	a2,160
In addition to the bootloader and application binaries, we also saw that a
partition
table
was constructed and loaded into flash (it was the last item and had size of only
3072 bytes). The partition table informs the bootloader where various data is
located in flash. We saw a visual representation of its contents in the
bootloader logs when we reset the CPU.
I (53) boot: Partition Table:
I (57) boot: ## Label            Usage          Type ST Offset   Length
I (64) boot:  0 nvs              WiFi data        01 02 00009000 00006000
I (71) boot:  1 phy_init         RF data          01 01 0000f000 00001000
I (79) boot:  2 factory          factory app      00 00 00010000 00100000
I (86) boot: End of partition table
In this case, we are loading the factory partition, which is where our
application was written to flash (0x00010000). There are a number of steps in
this process, but the sequence maps to the following function calls.
void bootloader_utility_load_boot_image(const bootloader_state_t *bs, int start_index): determines where the desired image exists and, if it cannot be found, goes through a series of fallback options.static void load_image(const esp_image_metadata_t *image_data): copies loaded segments to RAM and sets up caches for mapped segments.static void unpack_load_app(const esp_image_metadata_t *data): configures mappings for MMU.
The final step is to actually start the application, which is accomplished by
defining an entry symbol at the entry_addr, then calling it.
components/bootloader_support/src/bootloader_utility.c
static void set_cache_and_start_app(
    uint32_t drom_addr,
    uint32_t drom_load_addr,
    uint32_t drom_size,
    uint32_t irom_addr,
    uint32_t irom_load_addr,
    uint32_t irom_size,
    uint32_t entry_addr)
{
    ...
    ESP_LOGD(TAG, "start: 0x%08"PRIx32, entry_addr);
    bootloader_atexit();
    typedef void (*entry_t)(void) __attribute__((noreturn));
    entry_t entry = ((entry_t) entry_addr);

    // TODO: we have used quite a bit of stack at this point.
    // use "movsp" instruction to reset stack back to where ROM stack starts.
    (*entry)();
}
Concluding Thoughts Link to heading
Bootloaders are a great place to look when you want to understand how software and hardware communicate. While you may never need to modify the bootloader yourself, knowledge of how it works is useful for conceptualizing how changes made at higher levels utlimately translate to the machine.
As always, these posts are meant to serve as a useful resource for folks who are interested in learning more about RISC-V and low-level software in general. If I can do a better job of reaching that goal, or you have any questions or comments, please feel free to send me a message @hasheddan on Twitter or @hasheddan@types.pl on Mastodon!