The energy from Friday at Supercon 2023 carried over into Saturday, and adding a stream of ongoing talks to the badge hacking and hallway track made it feel like even more was going on. The setup today was the traditional Supercon “hacker alley”, with the two talk venues connected by a long, narrow corridor packed with people, parts, and soldering irons. Space was at a premium, but interesting conversation was readily available.
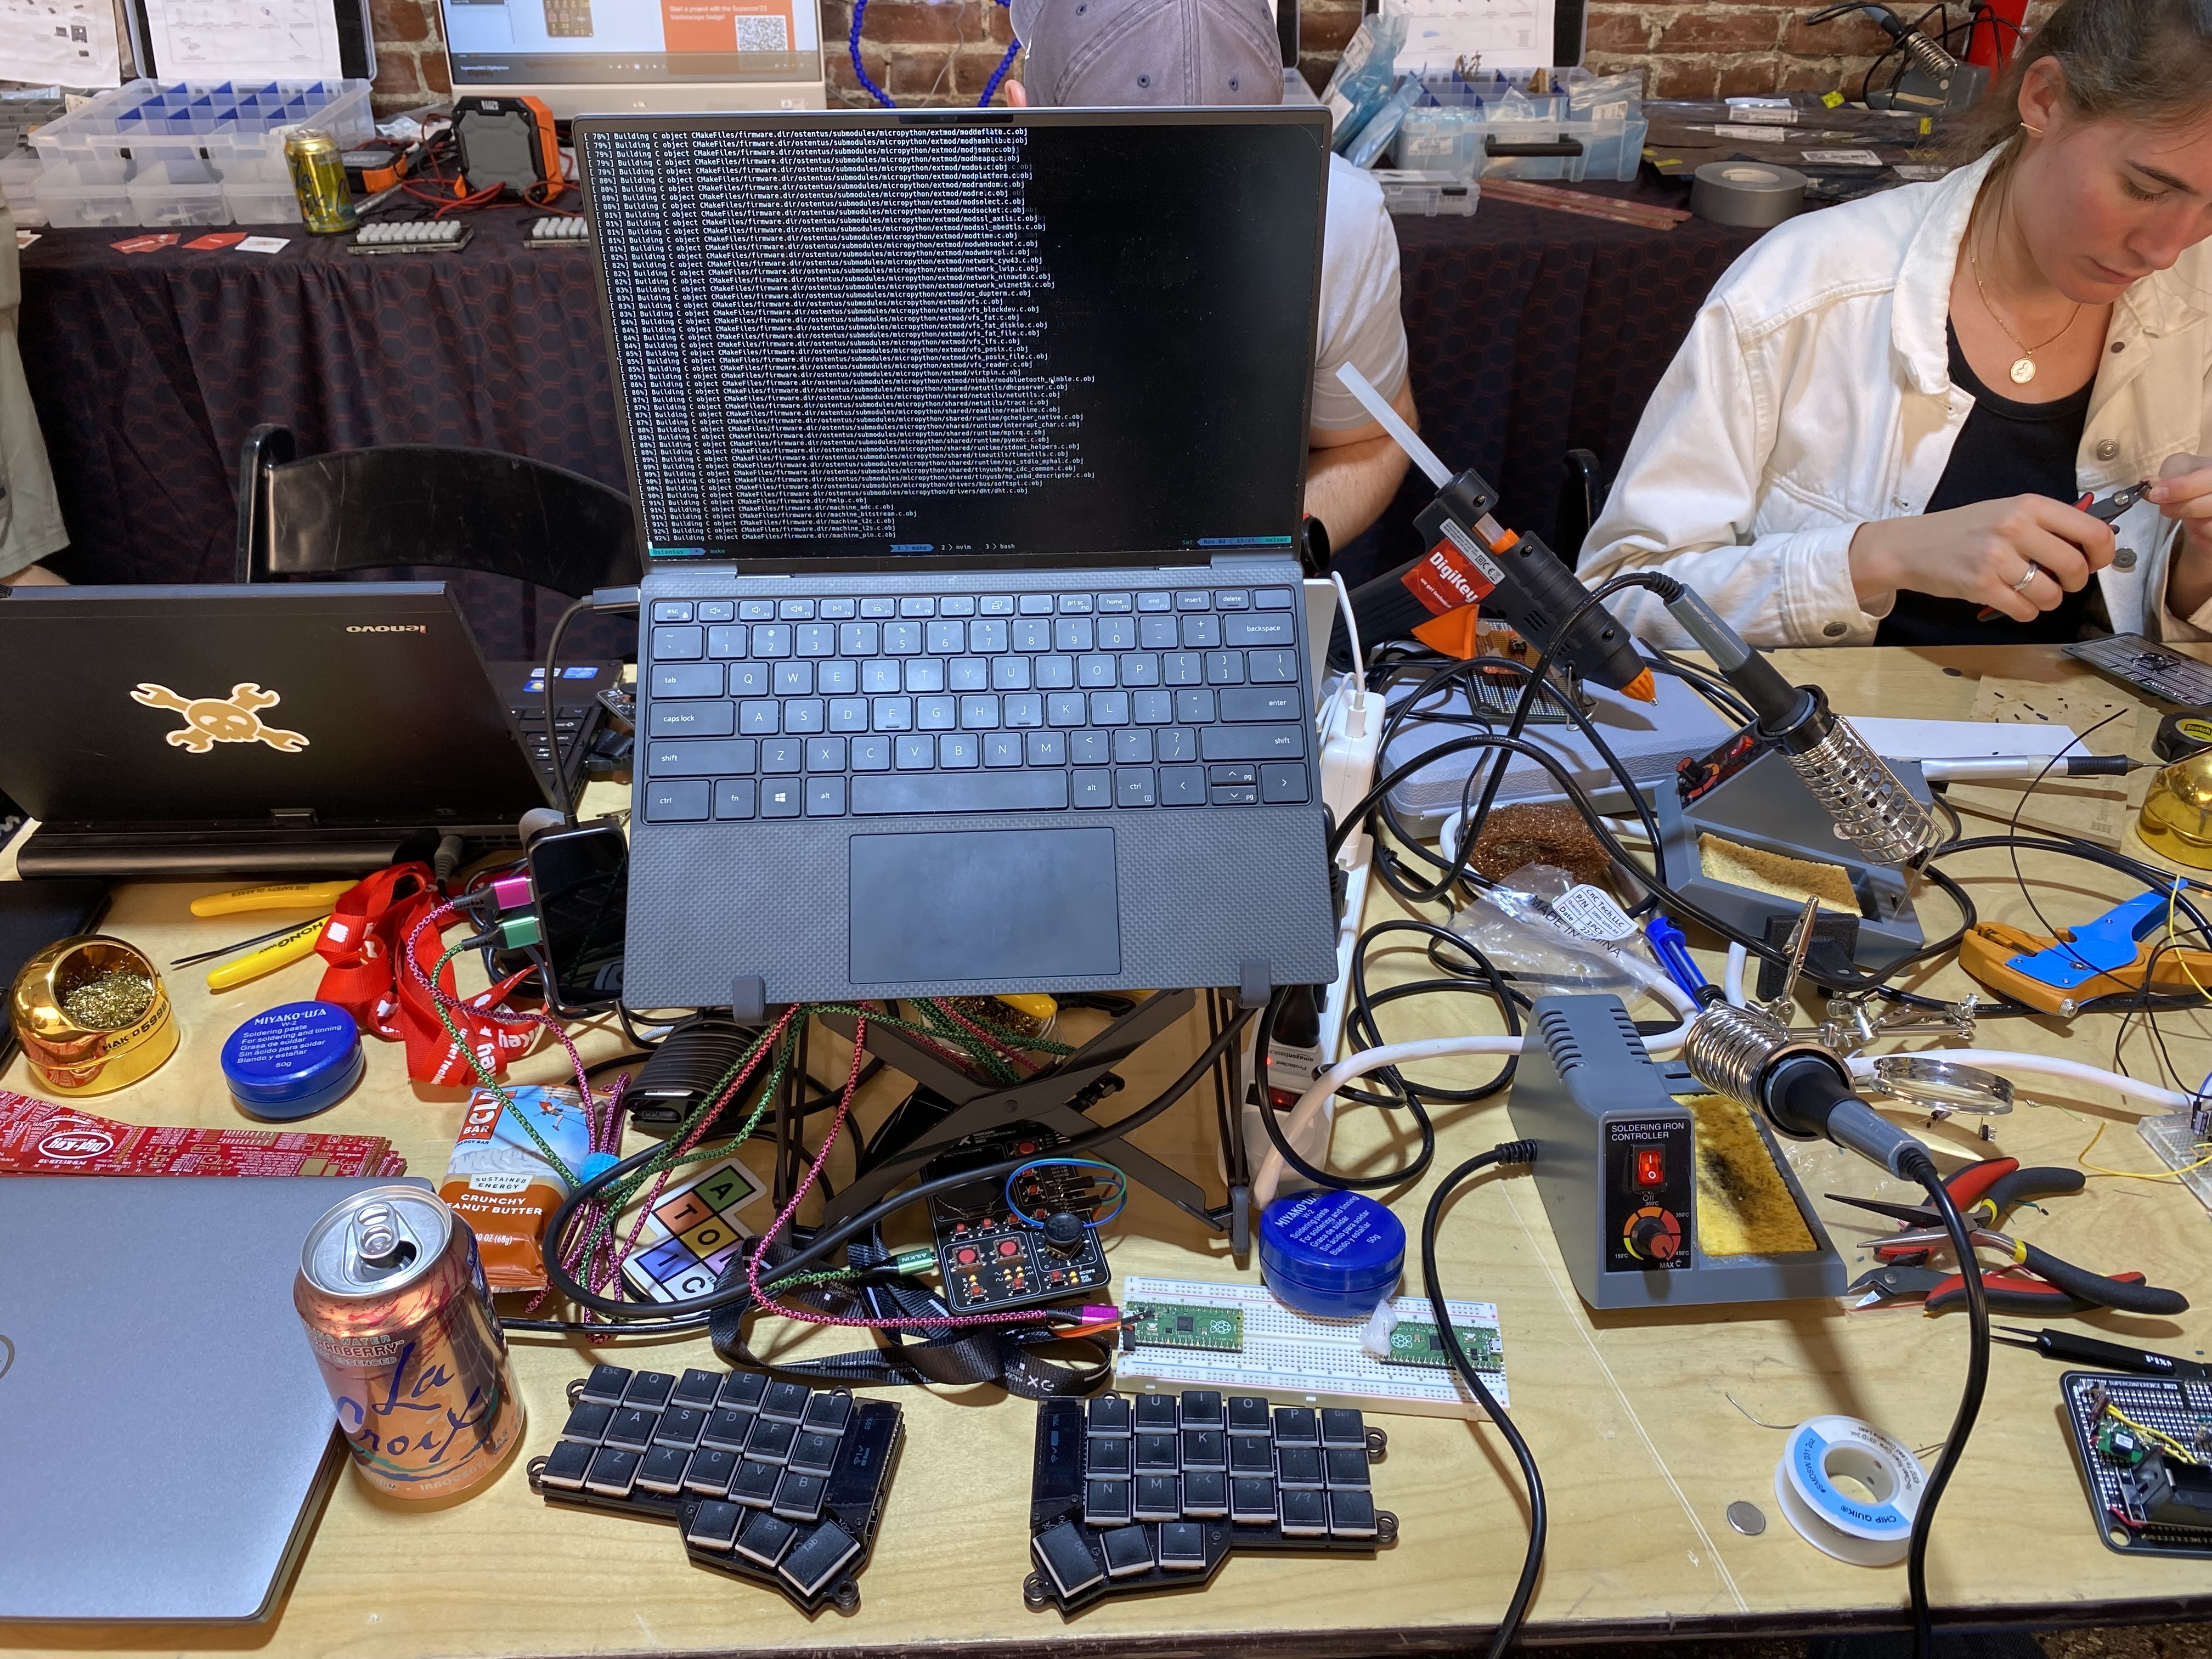
Mike was able to squeeze his awesome portable work station, tiny keyboard and all, into one of the hacking tables.
While out on my morning run before heading over to the conference, I was thinking through some of the issues that we had run into with our planned badge demo that day prior. Without divulging the entire premise of the project (I’ll save that for tomorrow’s update after the badge showcase), the primary problem we needed to solve was getting the X / Y points off of the badge in between the Pico’s RP2040 reading them from the ADC and sending them to the display. The capabilities of the RP2040, paired with the creativity of the badge creators, caused this to be quite a difficult conundrum.
First of all, the badge firmware is leveraging the RP2040’s PIO support to implement state machines that read from the ADC pins and write to the display pins. In between, a series of direct memory access (DMA) channels were configured to shuffle the bits around as needed. We had initially planned to capture the coordinates and send them out to a peripheral device over I2C, but the volume of points, coupled with the speed of transfer, resulted in this being quite difficult.
Our first attempt was just trying to read the memory address where the coordinate values were being written to and read from via DMA. We were able to get some data from this strategy, but it was a tiny sample of all the points that were being processed. I converted the samples to GIFs to observe how closely the behavior matched the display. As you can see below, the result only vaguely matches the square wave Lissajous demo that was being captured.

We figured that trying to get the data outside of the chain of DMA channels was likely going to be a failing strategy, so the next option was to attempt to insert our own DMA channel into the chain to persist the points in a buffer in memory. A snippet of the setup of DMA channels is provided below, with configuration for loading x, y, and color values.
self.pixel_load_x.ctrl = self.pixel_load_x.pack_ctrl(default = 0,
                                                     size      = dma_defs.SIZE_1BYTE,
                                                     enable    = 1,
                                                     treq_sel  = dma_defs.TREQ_PERMANENT,
                                                     chain_to  = self.pixel_load_y.channel_id,
                                                     IRQ_quiet = 1
                                                     )
self.pixel_load_x.config(count = 1,
                         read  = self.one_sample_storage_address + X_MSB_OFFSET,
                         write = self.command_x)

self.pixel_load_y.ctrl = self.pixel_load_y.pack_ctrl(default = 0,
                                                     size      = dma_defs.SIZE_1BYTE,
                                                     enable    = 1,
                                                     treq_sel  = dma_defs.TREQ_PERMANENT,
                                                     chain_to  = self.pixel_load_color.channel_id,
                                                     IRQ_quiet = 1
                                                     )
self.pixel_load_y.config(count = 1,
                         read  = self.one_sample_storage_address + Y_MSB_OFFSET,
                         write = self.command_y)

self.pixel_load_color.ctrl = self.pixel_load_color.pack_ctrl(default = 0,
                                                     bswap     = 1,
                                                     size      = dma_defs.SIZE_2BYTES,
                                                     enable    = 1,
                                                     treq_sel  = dma_defs.TREQ_PERMANENT,
                                                     chain_to  = self.pixel_command_to_screen.channel_id,
                                                     IRQ_quiet = 1
                                                     )
self.pixel_load_color.config(count = 1,
                         read  = self.color_storage_address,
                         write = self.command_color)
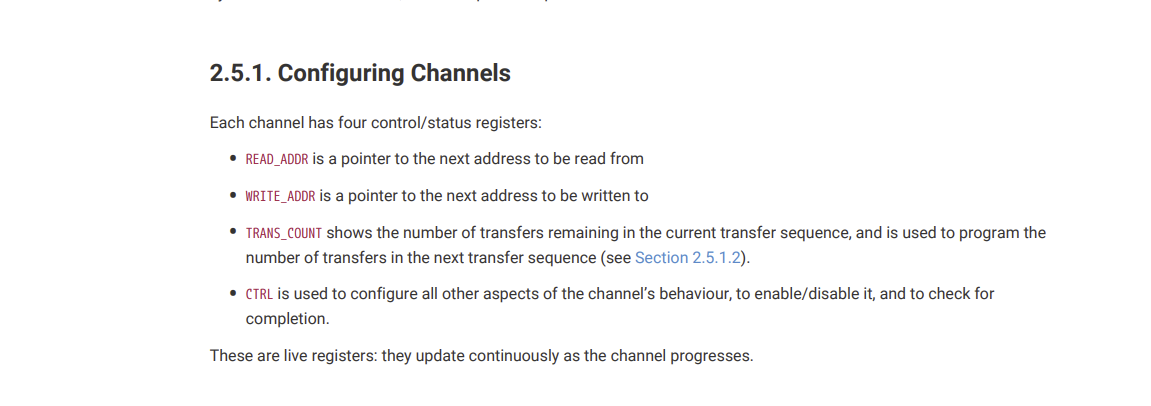
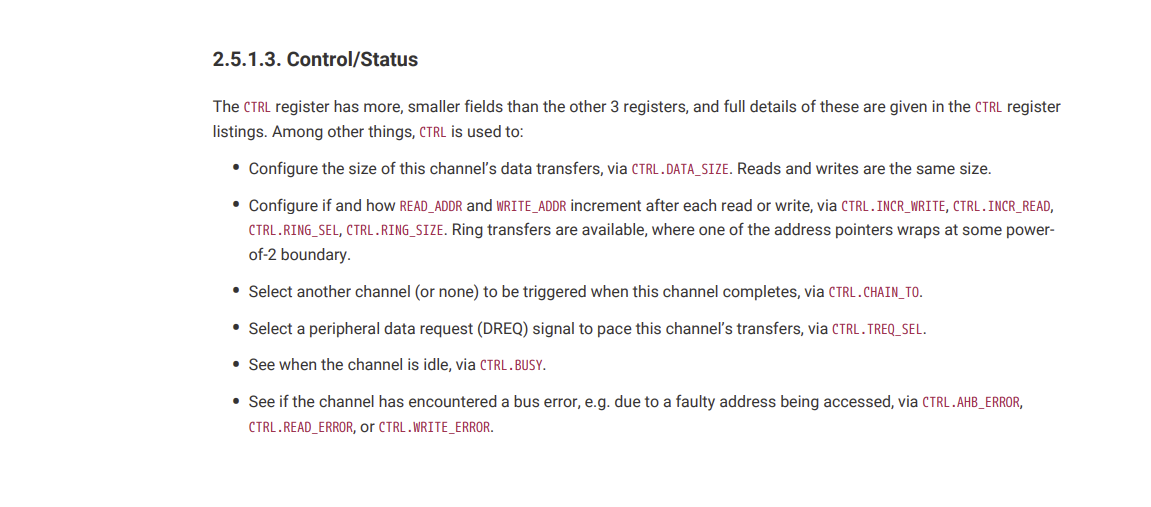
The meaning of the ctrl and config values can be found in the RP2040
datasheet.
The first issue we encountered when trying to add our own channel was that the RP2040 only has 12 DMA channels, and they were all already in-use by the badge firmware. However, if we were able to capture the points correctly, we could remove a few of the DMA channels shown above that fetched the data for the display as we were fine with the display not working while we captured (after all, we would be able to play it back from the captured data!).
We did make some progress on this front by setting up a buffer, setting
config.write to its address, and configuring the DMA channel ctrl with
ring_sel=1 (wrap write address at ring_size) and ring_size=4 (use a ring
of 16 bytes). Ultimately, trying to make the buffer large enough to capture a
meaningful volume of the points started causing crashes. I’d still like to
continue hacking in this realm, but we were running out of time and needed to
get something working.
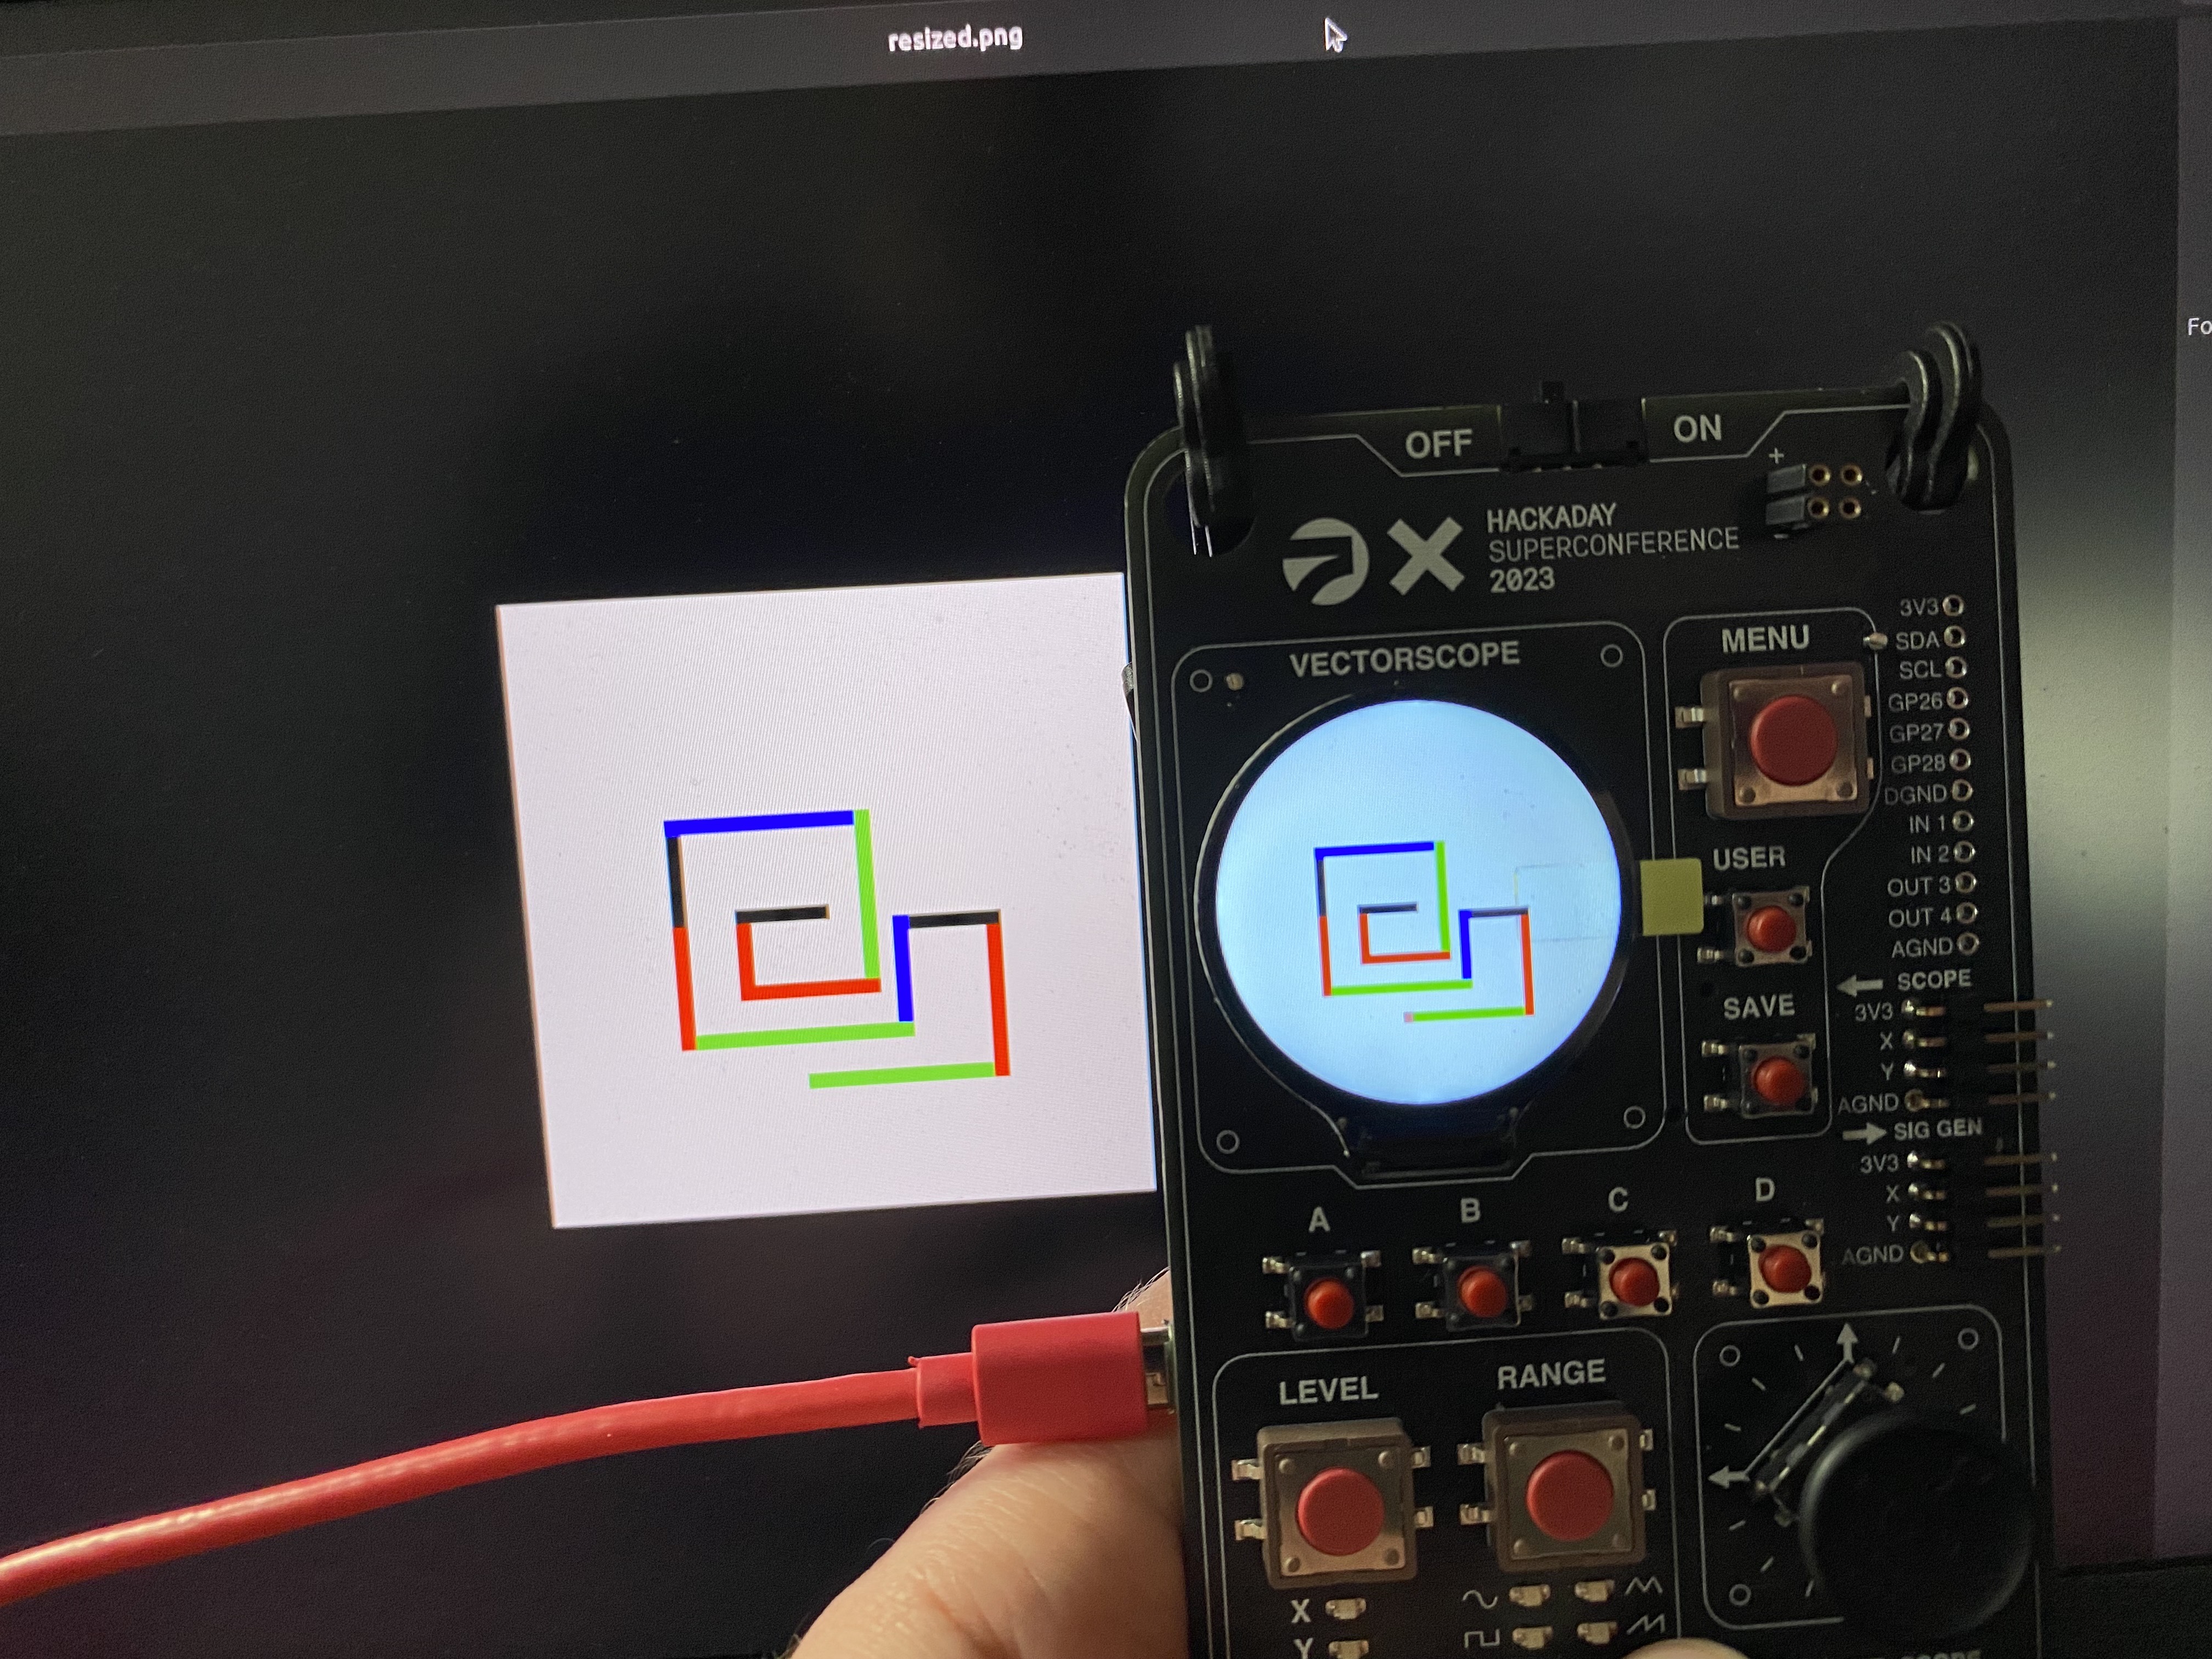
Another idea I had also thought of during my morning run was to just capture static images, a much simpler proposition. One of the pre-loaded badge demos was a sketching application that lets the user draw on the screen using the joystick in a 40x40 window. The state of the screen was stored in a matrix of 16-bit RGB (RGB565) values. The Pico Micropython SDK has support for running as an I2C controller, but we needed it to act as a peripheral. Mike had previously used the Pico as a I2C peripheral in another project using the C SDK, and he was able to include it in his own build of Micropython, which he then loaded onto the badge.
I was busy hacking on the “backend” of our demo, which I’ll be sharing more about in tomorrow’s post. As shown below, we were able to reliably get the display data off of the badge and re-render it.
Talk Highlights Link to heading
In between our hacking exploits, I was able to attend three awesome talks. Rather than recap them invidually here, I have linked to the live stream recordings so that you can watch them yourself!
- Ben Combee: A Hacker’s Guide To Audio/Video Formats
- Aleksa Bjelogrlic: A Circuit to Measure Circuits: How do Oscilloscopes do it?
- Jeroen Domburg: Building a Portable Vectrex, The Right Way
Check back tomorrow for the Day 3 update, in which I’ll include much more information about our final badge demo!