This post is the second in a RISC-V Bytes subseries on the PINE64 Pinecil soldering iron and development board. Previous and subsequent posts can be found under the RISC-V Bytes category.
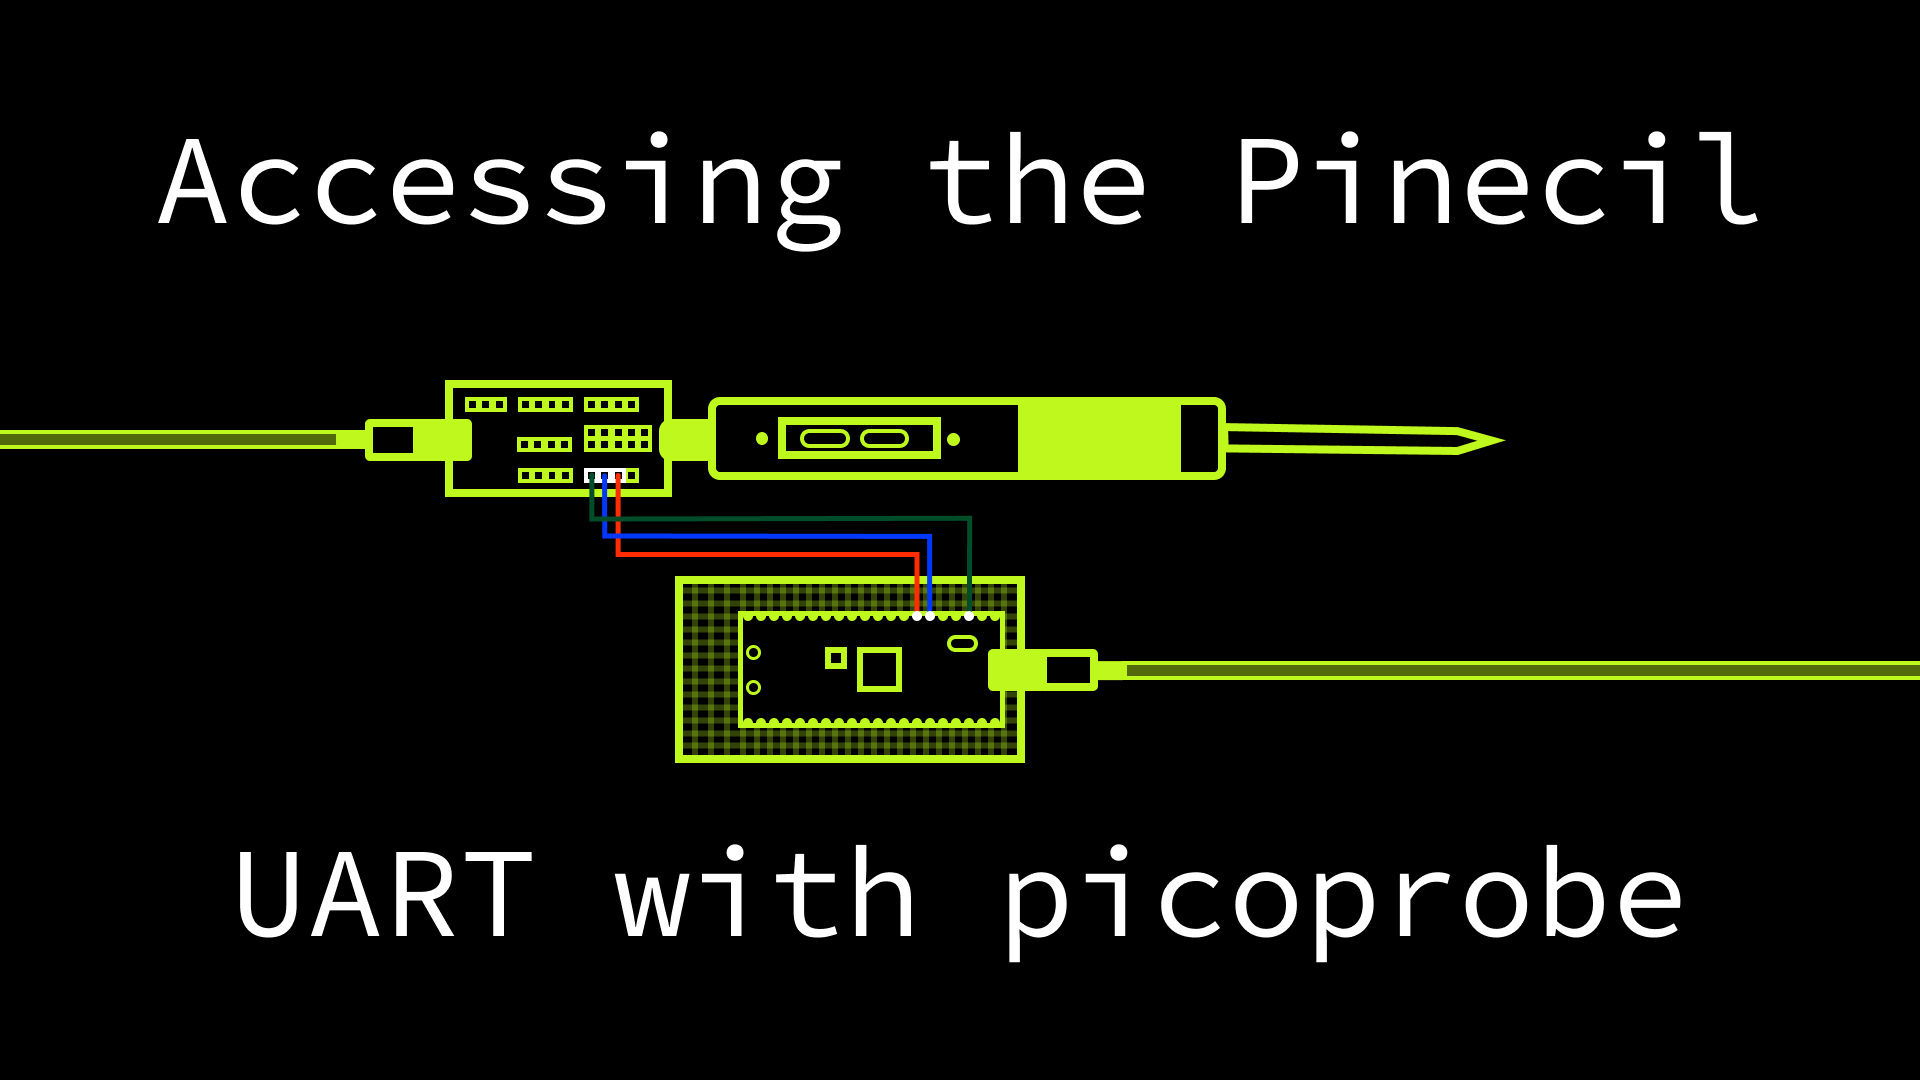
In the most recent Pinecil post, we walked through how to solder the header pins on the Pinecil breakout board. With the headers attached, we can now communicate with the Pinecil’s microcontroller via a number of protocols. Today we are going to focus on accessing the Universal Asynchronous Receiver / Transmitter (UART) hardware in order to receive serial data from the microcontroller, such as log messages, on a development machine (e.g. laptop).
However, though the breakout board does allow us to access the UART pins, it is likely that your development machine does not expose its own UART interface. Instead, most machines are equipped with more commonly used ports for peripherals, such as Universal Serial Bus (USB). In order to communicate between the Pinecil microcontroller and the development machine, we’ll need some sort of bridge. While there is plenty of dedicated hardware that can be purchased for a few dollars, such as this USB to serial converter, I have been leveraging my small collection of Raspberry Pi Pico’s for tasks such as this since attending Hackaday Supercon 2023 and hacking on the conference badge, which included a Pico on the back of the PCB.
The Pico is the first Raspberry Pi product to use in-house silicon, incorporating the RP2040, a microcontroller with dual ARM Cortex-M0+ processors, and a highly flexible programmable input / output (PIO) system. The “downside” of using a general purpose microcontroller, rather than dedicated hardware, for our USB-UART bridge is that we’ll need to write or obtain firmware that performs the desired functionality.
Fortunately, Raspbery Pi explicitly encourages using the Pico for this type of use case.
Building the Pico Firmware Link to heading
Appendix A of the Pico Getting Started
Guide
introduces the use of the Pico as a programming and debugging device. To support
this scenario, they have supplied open source firmware, appropriately named
picoprobe, that is built on
FreeRTOS and the Pico C/C++
SDK.
While the guide primarily describes its use when working with a second Pico,
picoprobe can be useful with any other device that exposes UART pins or a
Serial Wire Debug
(SWD)
port. Raspberry Pi also offers a debug
probe, which is essentially
a Pico with picoprobe pre-programmed on the RP2040, and dedicated ports and
connectors for UART and SWD.
picoprobe is configured using a header file, which is then included in
src/picoprobe_config.h.
There are two built-in configurations, one for the
Pico
and one for the debug
probe.
We can use the Pico configuration, and because it is the default, the following
steps can be used to build picoprobe without any updates.
- Ensure all submodules are up to date.
$ git submodule update --init
Submodule 'CMSIS_5' (https://github.com/ARM-software/CMSIS_5) registered for path 'CMSIS_5'
Submodule 'freertos' (https://github.com/FreeRTOS/FreeRTOS-Kernel) registered for path 'freertos'
Cloning into '/home/hasheddan/code/github.com/raspberrypi/picoprobe/CMSIS_5'...
Cloning into '/home/hasheddan/code/github.com/raspberrypi/picoprobe/freertos'...
Submodule path 'CMSIS_5': checked out 'a65b7c9a3e6502127fdb80eb288d8cbdf251a6f4'
Submodule path 'freertos': checked out '2dfdfc4ba4d8bb487c8ea6b5428d7d742ce162b8'
- Create a build directory and enter it.
$ mkdir build && cd "$_"
- Generate build files with
cmake, specifying that the Pico SDK should be fetched as part of the operation (PICO_SDK_FETCH_FROM_GIT).
$ PICO_SDK_FETCH_FROM_GIT=on cmake ..
Using PICO_SDK_FETCH_FROM_GIT from environment ('on')
Downloading Raspberry Pi Pico SDK
PICO_SDK_PATH is /home/hasheddan/code/github.com/raspberrypi/picoprobe/build/_deps/pico_sdk-src
Defaulting PICO_PLATFORM to rp2040 since not specified.
Defaulting PICO platform compiler to pico_arm_gcc since not specified.
-- Defaulting build type to 'Release' since not specified.
PICO compiler is pico_arm_gcc
-- The C compiler identification is GNU 10.3.1
-- The CXX compiler identification is GNU 10.3.1
-- Detecting C compiler ABI info
-- Detecting C compiler ABI info - done
-- Check for working C compiler: /usr/bin/arm-none-eabi-gcc - skipped
-- Detecting C compile features
-- Detecting C compile features - done
-- Detecting CXX compiler ABI info
-- Detecting CXX compiler ABI info - done
-- Check for working CXX compiler: /usr/bin/arm-none-eabi-g++ - skipped
-- Detecting CXX compile features
-- Detecting CXX compile features - done
-- The ASM compiler identification is GNU
-- Found assembler: /usr/bin/arm-none-eabi-gcc
Build type is Release
Defaulting PICO target board to pico since not specified.
Using board configuration from /home/hasheddan/code/github.com/raspberrypi/picoprobe/build/_deps/pico_sdk-src/src/boards/include/boards/pico.h
-- Found Python3: /usr/bin/python3.10 (found version "3.10.12") found components: Interpreter
TinyUSB available at /home/hasheddan/code/github.com/raspberrypi/picoprobe/build/_deps/pico_sdk-src/lib/tinyusb/src/portable/raspberrypi/rp2040; enabling build support for USB.
BTstack available at /home/hasheddan/code/github.com/raspberrypi/picoprobe/build/_deps/pico_sdk-src/lib/btstack
cyw43-driver available at /home/hasheddan/code/github.com/raspberrypi/picoprobe/build/_deps/pico_sdk-src/lib/cyw43-driver
Pico W Bluetooth build support available.
lwIP available at /home/hasheddan/code/github.com/raspberrypi/picoprobe/build/_deps/pico_sdk-src/lib/lwip
mbedtls available at /home/hasheddan/code/github.com/raspberrypi/picoprobe/build/_deps/pico_sdk-src/lib/mbedtls
-- Configuring done
-- Generating done
-- Build files have been written to: /home/hasheddan/code/github.com/raspberrypi/picoprobe/build
- Build the firmware.
$ make
[  2%] Built target bs2_default
[  4%] Built target bs2_default_padded_checksummed_asm
[  5%] Performing build step for 'PioasmBuild'
[100%] Built target pioasm
[  6%] No install step for 'PioasmBuild'
[  7%] Completed 'PioasmBuild'
[ 11%] Built target PioasmBuild
[ 12%] Built target picoprobe_probe_pio_h
[ 13%] Built target picoprobe_probe_oen_pio_h
[ 14%] Performing build step for 'ELF2UF2Build'
[100%] Built target elf2uf2
[ 15%] No install step for 'ELF2UF2Build'
[ 15%] Completed 'ELF2UF2Build'
[ 19%] Built target ELF2UF2Build
[ 20%] Building C object CMakeFiles/picoprobe.dir/src/led.c.obj
[ 21%] Building C object CMakeFiles/picoprobe.dir/src/main.c.obj
[ 22%] Building C object CMakeFiles/picoprobe.dir/src/usb_descriptors.c.obj
[ 23%] Building C object CMakeFiles/picoprobe.dir/src/probe.c.obj
[ 24%] Building C object CMakeFiles/picoprobe.dir/src/cdc_uart.c.obj
[ 25%] Building C object CMakeFiles/picoprobe.dir/src/sw_dp_pio.c.obj
[ 25%] Building C object CMakeFiles/picoprobe.dir/src/tusb_edpt_handler.c.obj
[ 26%] Building C object CMakeFiles/picoprobe.dir/CMSIS_5/CMSIS/DAP/Firmware/Source/DAP.c.obj
[ 27%] Building C object CMakeFiles/picoprobe.dir/CMSIS_5/CMSIS/DAP/Firmware/Source/JTAG_DP.c.obj
[ 28%] Building C object CMakeFiles/picoprobe.dir/CMSIS_5/CMSIS/DAP/Firmware/Source/DAP_vendor.c.obj
[ 29%] Building C object CMakeFiles/picoprobe.dir/CMSIS_5/CMSIS/DAP/Firmware/Source/SWO.c.obj
[ 30%] Linking CXX executable picoprobe.elf
[100%] Built target picoprobe
After the build is complete, we should see a number of artifacts in the build
directory.
$ ls
CMakeCache.txt  cmake_install.cmake  elf2uf2          generated  picoprobe.bin  picoprobe.elf      picoprobe.hex  pico-sdk  probe_oen.pio.h
CMakeFiles      _deps                FREERTOS_KERNEL  Makefile   picoprobe.dis  picoprobe.elf.map  picoprobe.uf2  pioasm    probe.pio.h
Programming the Pico Link to heading
There are multiple ways to program the Pico, but the simplest is by holding down
the boot select (BOOTSEL) button while you connect it to your development
machine. This will cause the Pico to appear as a USB Mass Storage
Device, meaning
you can access it from your machine’s filesystem.
$ ls /media/hasheddan/RPI-RP2/
INDEX.HTM  INFO_UF2.TXT
Copying the picoprobe.uf2 file into the mounted directory will cause the
RP2040 to reboot and start running the firmware.
$ cp picoprobe.uf2 /media/hasheddan/RPI-RP2/
The Pico should now show up as a USB serial device.
$ ls /dev/ | grep "ACM\|USB"
ttyACM0
We can use minicom to monitor the serial output. Initially we shouldn’t see
any output as picoprobe is configured to direct its debug information to
UART0 by default. The output we eventually see over USB serial will be the
bridged output from the Pinecil microcontroller.
$ minicom -D /dev/ttyACM0 -b 2000000
Building the Pinecil Firmware Link to heading
The Pinecil v2 runs on the Bouffalo Lab BL706 chipset, which includes a 32-bit RISC-V processor based on the SiFive E24 core. It is supported by the open source IronOS project, which was originally developed as alternative firmware for the TS100 iron. IronOS is the default firmware on the Pinecil.
IronOS is also built on FreeRTOS, and leverages the bl_mcu_sdk, which has
evolved into the bouffalo_sdk.
According to the
datasheet,
the BL706 has two built-in UARTs, and IronOS
configures
UART0 to run at 2000000 baud, which is why we supplied the -b 2000000 to
minicom above.
#if defined(BSP_USING_UART0)
#ifndef UART0_CONFIG
#define UART0_CONFIG \
  { .id = 0, .baudrate = 2000000, .databits = UART_DATA_LEN_8, .stopbits = UART_STOP_ONE, .parity = UART_PAR_NONE, .fifo_threshold = 0, }
#endif
#endif
IronOS has an excellent Docker-based build flow, which alleviates the need to install your own RISC-V toolchain. The following steps can be used to build an English binary for the Pinecil v2.
- Start the build container.
$ ./scripts/deploy.sh

====>>>> Firing up & starting container...
	* type "./scripts/deploy.sh clean" to delete created container (but not cached data)

====>>>> /usr/bin/docker  compose  -f /home/hasheddan/code/github.com/Ralim/IronOS/./scripts/../Env.yml  run  --rm  builder

/build/ironos #
- Run build script.
/build/ironos # cd source/ && ./build.sh -l EN -m Pinecilv2

********************************************
               IronOS Firmware
        builder for Miniware + Pine64

                                    by Ralim
********************************************
Available languages : BE BG CS DA DE EL EN ES ET FI FR HR HU IT JA_JP LT NB NL NL_BE PL PT RO RU SK SL SR_CYRL SR_LATN SV TR UK VI YUE_HK ZH_CN ZH_TW
Requested languages : EN
********************************************
Available models : TS100 TS80 TS80P Pinecil MHP30 Pinecilv2 S60 TS101
Requested models : Pinecilv2
********************************************
Cleaning previous builds
    [Success]
********************************************
Building firmware for Pinecilv2 in EN
...
    [Success]
********************************************
 -- Firmwares successfully generated --
End...
After the build completes, you can type exit to exit the container. Build
artifacts should be present in source/Hexfile/.
$ ls source/Hexfile/
Pinecilv2_EN.bin  Pinecilv2_EN.dfu  Pinecilv2_EN.elf  Pinecilv2_EN.elf.map  Pinecilv2_EN.hex
Programming the Pinecil Link to heading
The Pinecil can be programmed, including when connecting via the breakout board,
by holding down the button labeled - while plugging the USB cable into your
development machine. Pine64 offers an in-system programming
(ISP) tool for its
Bouffalo Lab devices, appropriately named blisp, which can be downloaded from
the project’s releases page.
After installing, the following command can be used to flash the IronOS firmware onto the device.
$ sudo ./blisp write -c bl70x --reset Pinecilv2_EN.bin
Sending a handshake...
Handshake successful!
Getting chip info...
BootROM version 1.0.2.7, ChipID: 0000C41CD8FDD7C4
0b / 59200 (0.00%)
4092b / 59200 (6.91%)
...
59200b / 59200 (100.00%)
Sending a handshake...
Handshake with eflash_loader successful.
Input file identified as a .bin file
Erasing flash to flash boot header
Flashing boot header...
Erasing flash for firmware, this might take a while...
Flashing the firmware 188440 bytes @ 0x00002000...
0b / 188440 (0.00%)
2052b / 188440 (1.09%)
...
188440b / 188440 (100.00%)
Checking program...
Program OK!
Resetting the chip.
Flash complete!
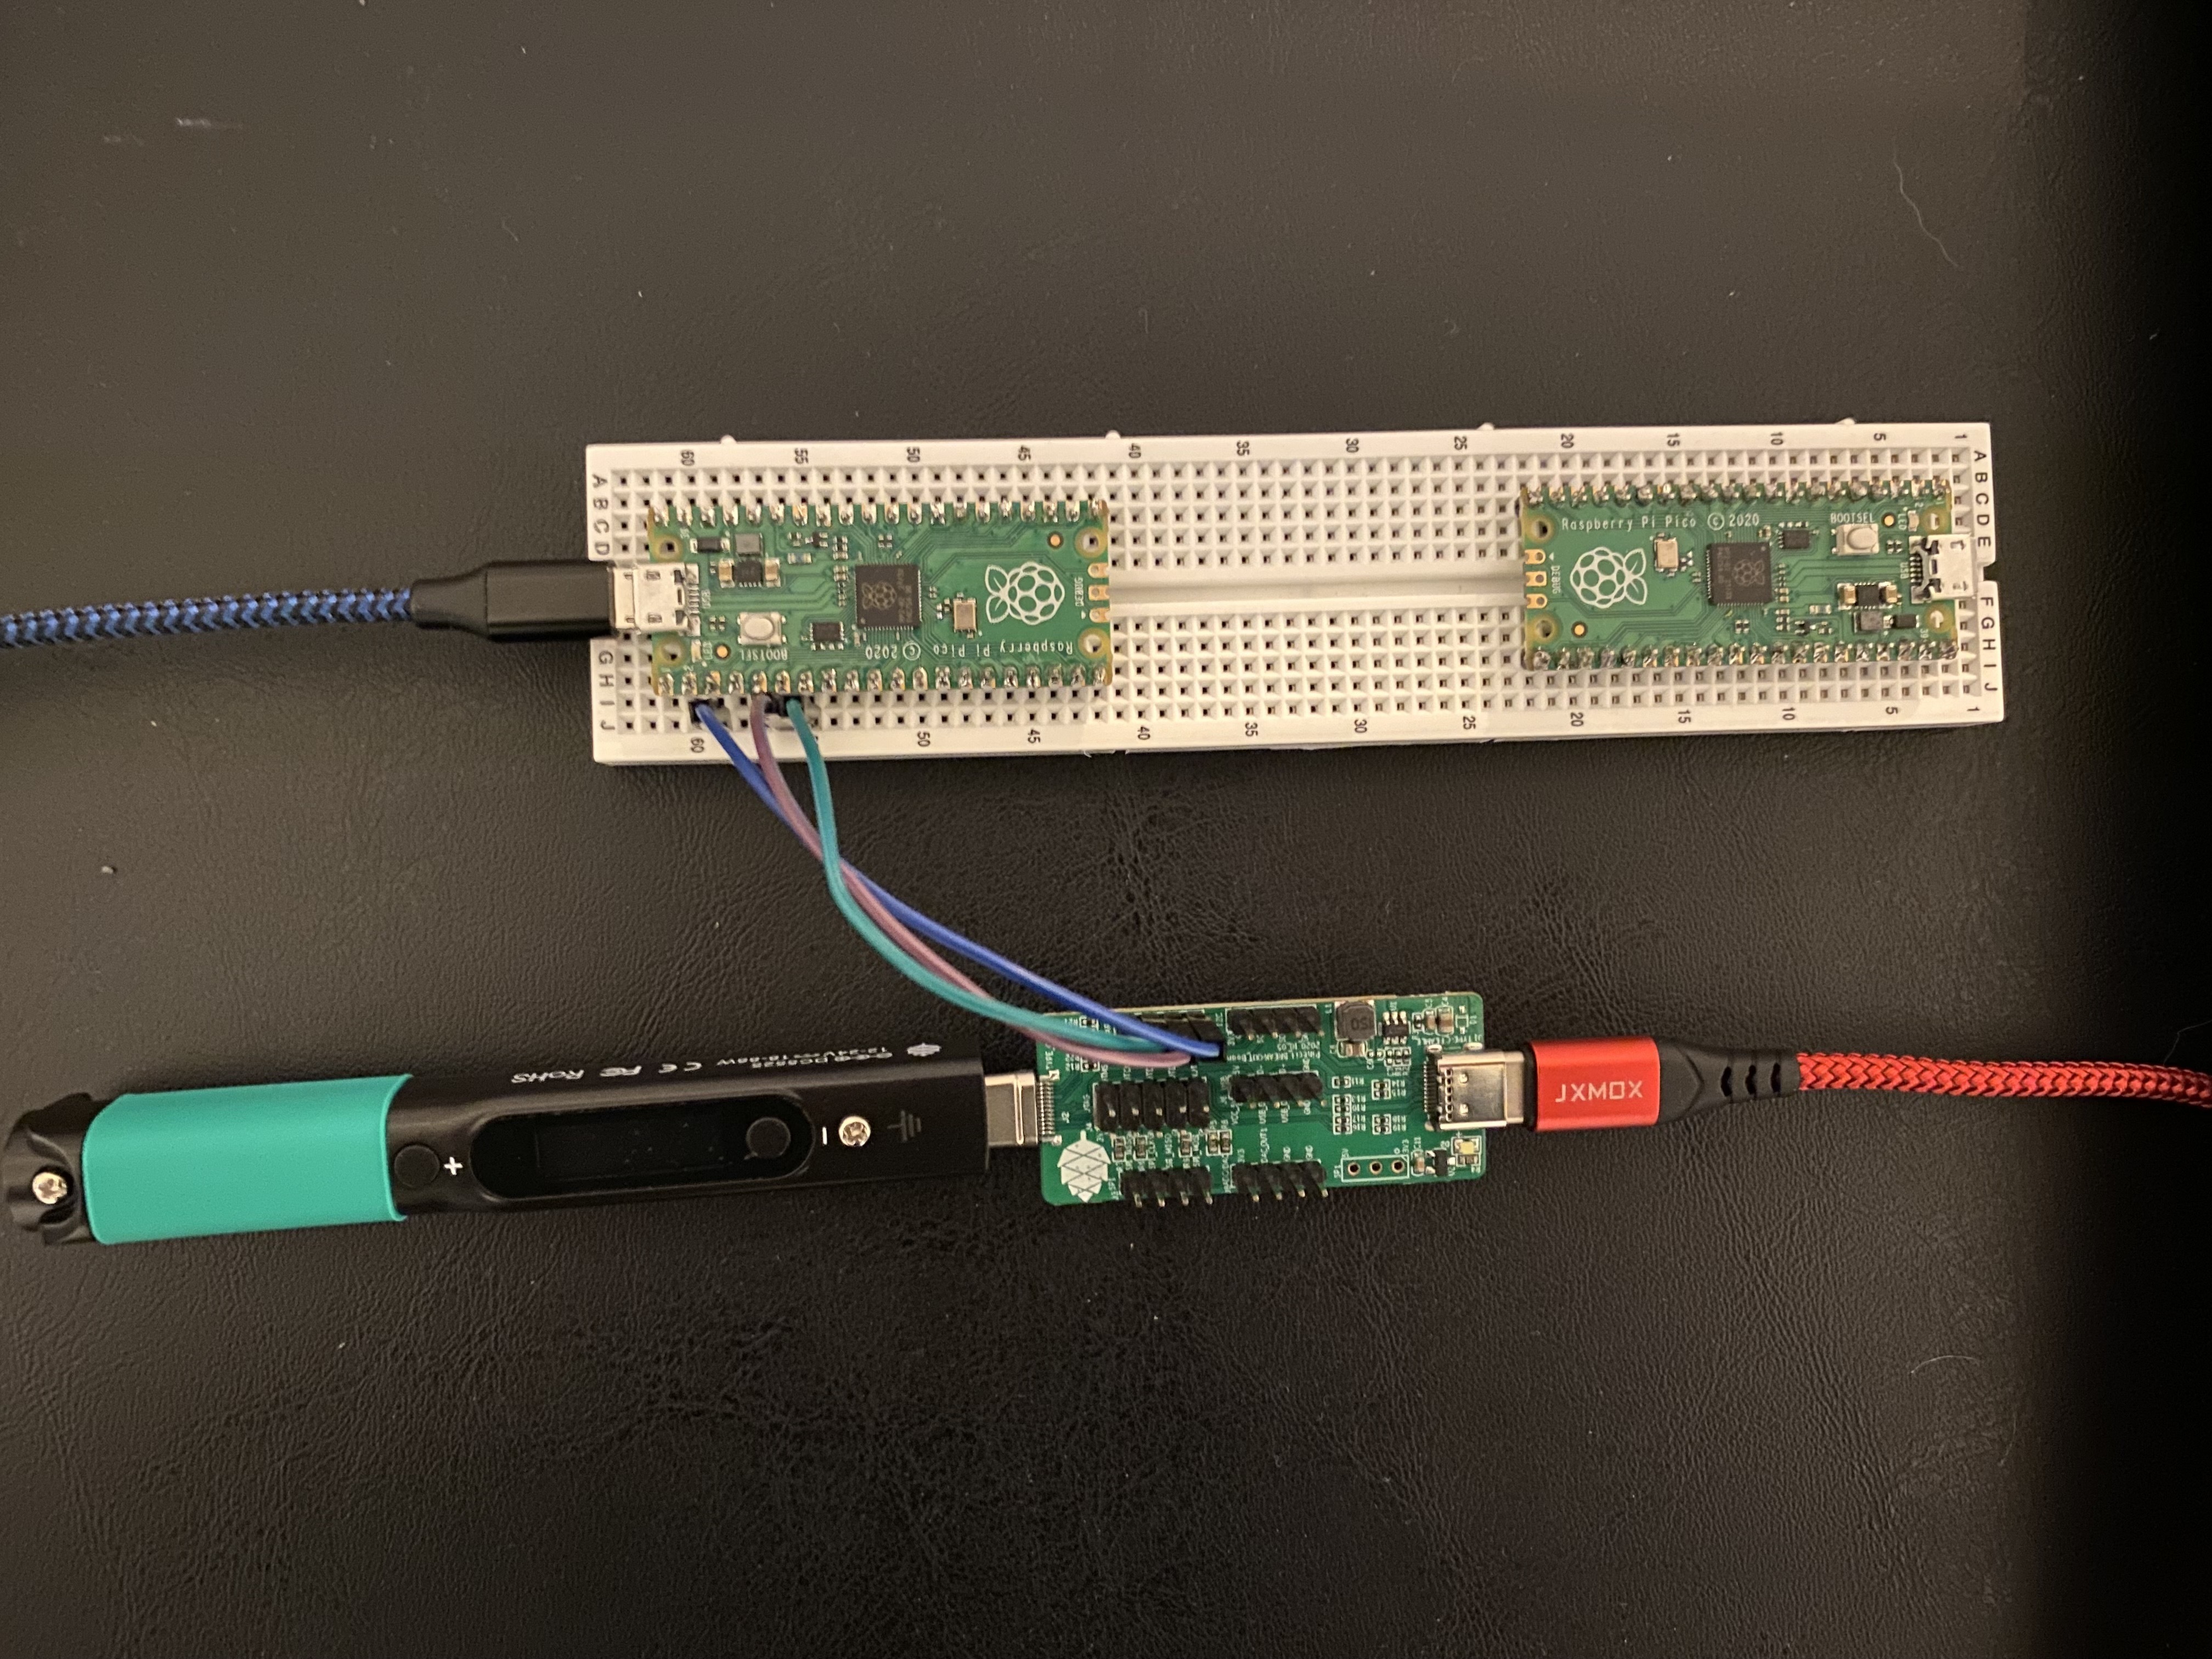
Connecting the Pinecil to the Pico Link to heading
The last step to see the serial output emitted by the IronOS firmware running on
the Pinecil is to connect the UART pins on the breakout board to the Pico
running picoprobe. UART1 on the Pico is used for the USB-UART bridge, and
pins 6 and 7 correspond to UART1 TX and UART1 RX respectively. The RX pin
on the Pinecil breakout UART header should be connected to pin 6 on the Pico,
while TX should be connected to pin 7. Lastly, the UART GND (ground) pin on
the breakout board should be connected to a GND pin, such as pin 3, on the
Pico. The full mapping is provided below.
| Pinecil Breakout | Pico |
|---|---|
| UART RX | Pin 6 (UART1 TX) |
| UART TX | Pin 7 (UART1 RX) |
| UART GND | Pin 3 (GND) |
For a visual representation of the mapping, view the cover image of this post, which is a pin-accurate depiction of the wiring.
With the wiring in place, the Pico connected to your development machine, and
minicom running, we can connect the Pinecil to a power source via the breakout
board. We should see the following output in our minicom session with the
Pico.
dynamic memory init success,heap size = 48 Kbyte
show flash cfg:
jedec id   0x000000
mid            0xC2
iomode         0x11
clk delay      0x01
clk invert     0x01
read reg cmd0  0x05
read reg cmd1  0x00
write reg cmd0 0x01
write reg cmd1 0x00
qe write len   0x02
cread support  0x00
cread code     0x00
burst wrap cmd 0x77
-------------------
Enable IRQ's
Hello from Pinecil via picoprobe!
Pine64 Pinecilv2 Starting
BLE Starting
            BLE Starting...Done
                               BLE Starting advertising
This information is emitted by invoking
bflb_platform_init()
on startup. With the ability to build, program, and monitor the firmware, we can
start to make changes and test them out on the Pinecil hardware. In our next
post, we’ll begin walking through exactly what the Bouffalo Lab SDK and IronOS
are doing, then see how we can modify them to include new functionality.